Recently, I bought a Samsung phone, Galaxy S6. As a long time Android user, I get used to do a backup file first when I have a brand new handset. Because such a file will always help to restore the device when I meet some unexpected problems, of which careless deletion is an example. And more often than not, these accidents happens a lot. You might lose the phone, delete the files carelessly or with the thought that they are no longer needed.
Usually, doing a backup file once every month can save you a lot of time dealing with the trouble. After all, some documents may not be retrieved due to total erasing. Anyway, there are some tools I'd like to share with you—Samsung Kies, Android Backup & Restore, Android Manager and Mobile Transfer. All are easy to use and of their own features.
Tutorial 1: Backup and Restore Data with Samsung Kies
Store Files in PC
Samsung Kies is a Phone Suite for Samsung devices, with which you can manage files, do your backup and restore the phone. The software is available at the Samsung website. You may choose between Kies and Kies 3.
Step 1. Download and Launch Samsung Kies
Now, you may click the hyperlink to have the application downloaded. And then set it up. When that is done, double click the icon and the newly-opened window will be like this.
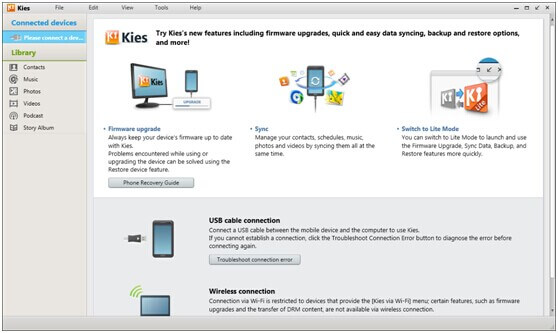
Connect the phone to PC with a USB cable. (The example we take here is an old Galaxy S3.) It won't cost you long before the software detects your Samsung. Next, a pop-up box may tell you to update the firmware. Press "Cancel” and the information will be shown on your screen.
Step 2. Choose the Samsung Data that are to be Saved
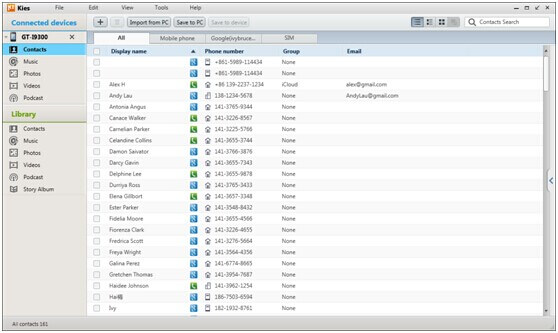
See the categories under the name of "GT-I9300”? These are the ones which you can store in you computer. You can preview contacts, music, photos, videos that exist in your phone. Take "Contacts” for example, specific information can be ticked. Tap "Save to PC” and finally, confirm it by pressing "OK”.
Recover Samsung Data
Step 1. Select the Recoverable File Types
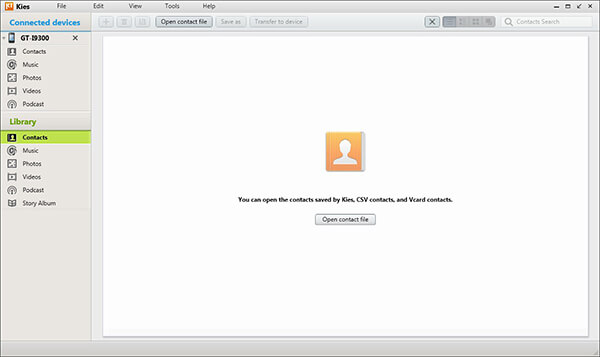
Beneath "Library”, there are several kinds of data, including contacts, audios and so on. Now, press whichever that you want to retrieve. For instance, if you would like to do contacts, the interface will tell you to open a file which you have ever saved as a backup. Press the button in the middle.
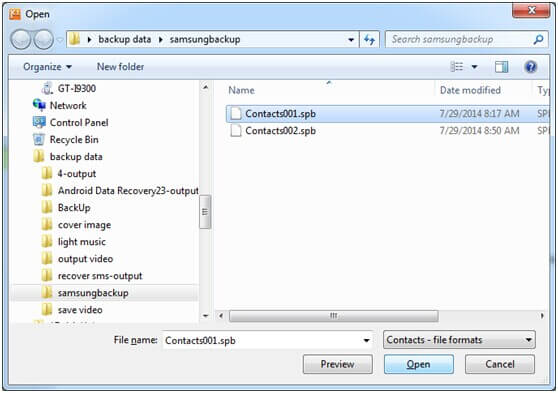
Choose the file folder and then open that document. Kies backup is downloaded after selection.
Step 2. Recover Information from Library
Check the ones that you prefer or simply all and "Transfer to device”. On the pop-up box, you may take one of the options—"Transfer all contacts” and "Transfer selected contacts”. After you click "OK”, another box will show up asking you to select the account on your phone that the numbers are imported to.
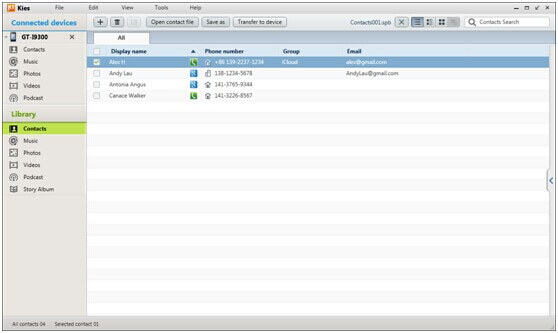
Note: If this is the first time you use Samsung Kies to restore the phone, you should open a backup file. And if not, the ones will be listed in the "Recently save contact file”.
Tutorial 2: Save and Recover Data with Android Data Recovery
Android Backup & Restore is usually used for recovering accidentally deleted files. But, the file managing feature of its is also quite impressive. Supported files includes contacts, call history, messages, calendar, gallery, videos, audios, apps and app data. The greatest function about it is the ability to save app data--though you have to root the phone first.
Do a Backup File of Samsung
Step 1. Connect Your Phone After Launching Android Data Recovery
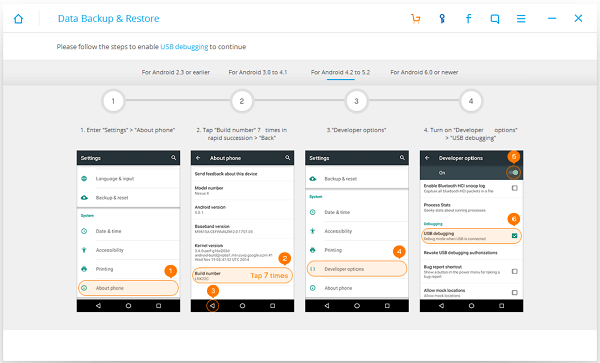
Install the program first and open it. You can then plug the phone in using a cable. Wait for a while until it detects your phone. If USB Debugging is not able, you'll get a notice like this. Please follow the steps on the interface to do it.
Step 2. Save the Data
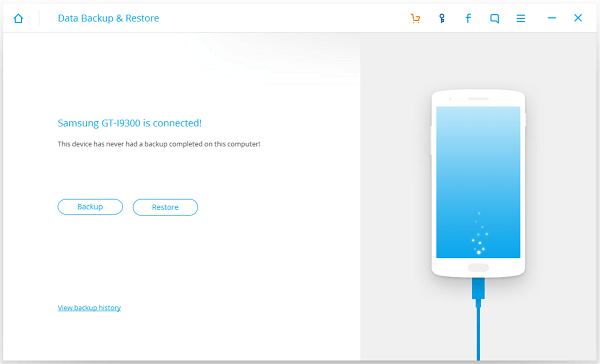
After that, click “Android Data Backup & Restore”. You will then see the button “Backup”. Click the button and choose file types. At the end, tap on the “Backup” button at the lower right.

Recover from Backup History
Step 1. Choose Backup File
Choose "Android Data Backup & Restore" in "More Tools" after you connect the phone to your PC. Click on the button "Restore". Choose one of the backup history.
Step 2. Select the Kinds of Data You Want to Get Back
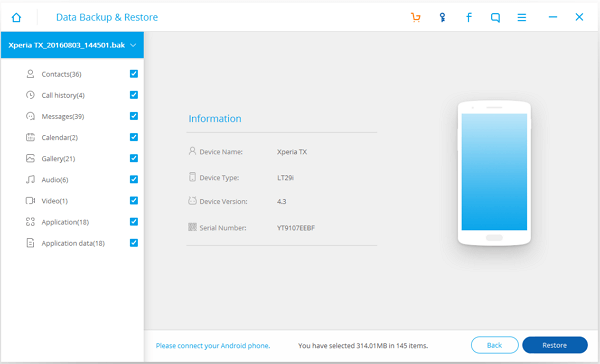
The types will be listed on the left bar. Tick whichever you like and click on the button "Restore". By the way, when an item is clicked on, details can be preview before you get them to the phone. Now, all that's left is waiting. If you don't pick a lot of data, it shouldn't be long.
Tutorial 3: Perform a Backup and Undelete Data with Android Manager
Want to find a simply-used, safely-running and reliable backup program? Android Manager is conducive to fixing what you need.
Step 1. Run Android Manager on PC
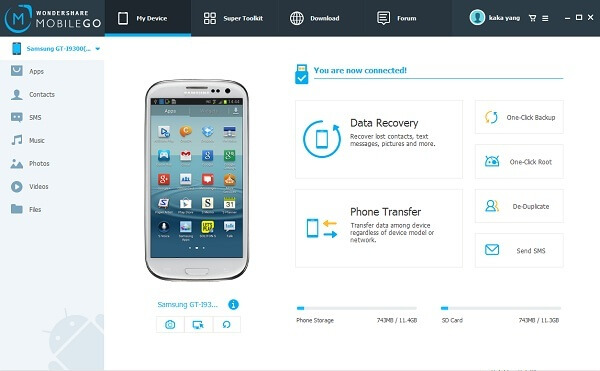
Launch the useful program on the personal computer and follow its guide to choose "Android" option to go on. Do not forget to use a practical cable to connect device to computer.
Step 2. Go to One-Click Backup
After allowing Android debugging on the Galaxy mobile, it is possible to press "One-Click Backup" on the homepage or hit it on "Super Toolkit". Then, choose certain data to operate "Back up" so that those data are saved on the PC.
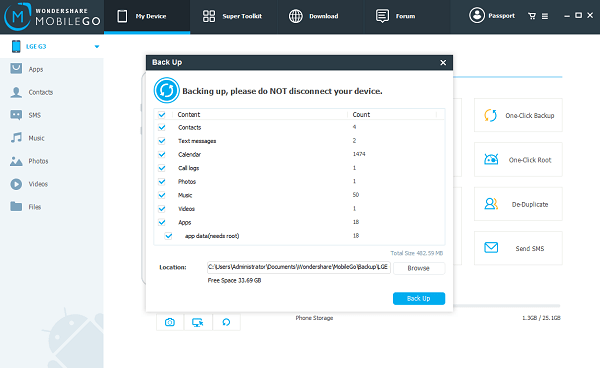
Note: When you intend to restore the files, go to "Super Toolkit" and click "Restore" to regain those contents on Samsung.
Tutorial 4: Do a Backup for Samsung and Restore via Mobile Transfer
First, you should download this tool, Mobile Transfer. It is an excellent tool that can be used for file transferring, backing up phones of various brands and recovering them
Back up with Galaxy Phone
Step 1. Run Mobile Transfer
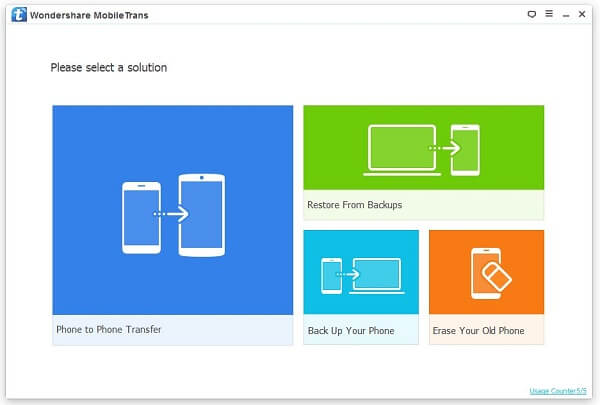
When you see this window, tap the light blue section, "Back Up Your Phone”in the lower right corner.
Step 2. Plug Samsung Phone in and Begin to Save Data
The process bar will tell you how it is going when the device is connected. In the middle, you are allowed to choose from "Contacts”, "Text Messages”, "Call Logs”, "Apps”, "Photos”, "Music” and "Videos”. The ones that you think are important should be selected. When that is done, "Start Copy”. At the end, press "OK”.
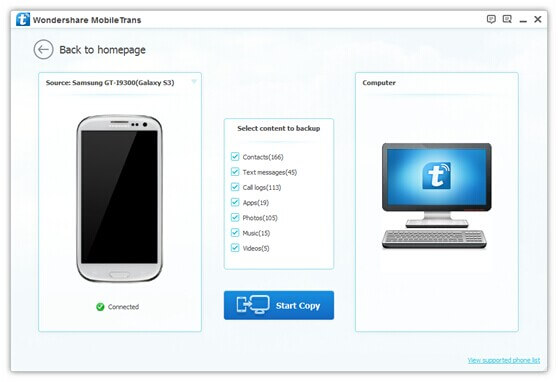
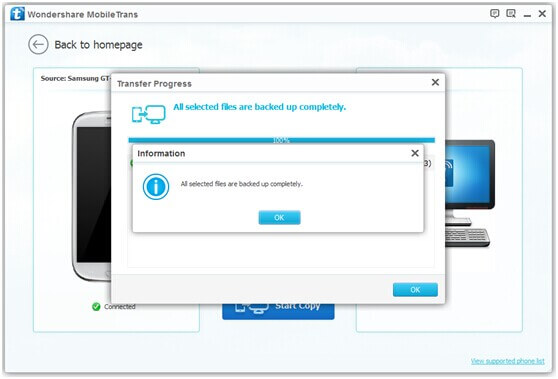
Note: Compared with the first program, this one can do it with SMS, call logs and apps.
Retrieve Data from Samsung Galaxy
Step 1. Choose "Restore From Backups”
When your mouse is on the icon, there will be six options, which are "MobileTrans”, "iTunes”, "iTunesMusic”, "Kies” and so forth. That is to say, you can utilize the files created by other software, even Samsung Kies. We may tap "MobileTrans” here.
Step 2. Take One of the Samsung Backup Files
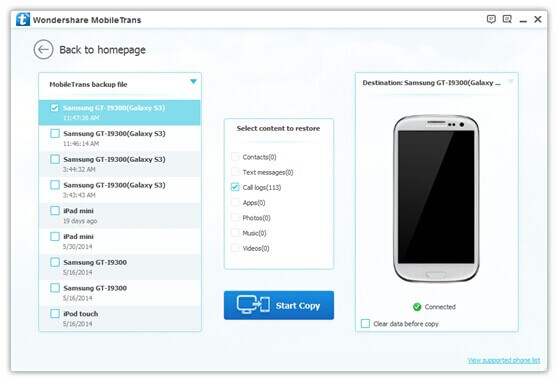
On the left, your documents will be listed. Check one of them. (You can use the most updated one according to the time under the names.) And then, file types are still to be chosen. But, only the ones that you have saved are operable.
Step 3. Get Started to Transfer Files
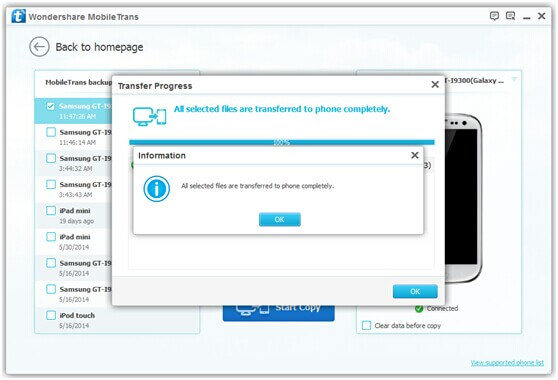
Press the button "Start Copy” and all is easily finished. You can tick "Clear data before copy” if in need.
Our tutorials end here. All, as I have said, are easy. Yet, I prefer the second because it is more user-friendly and offers more file types. And, I have to remind you, when an accidental file loss comes, don't panic. Stop adding files and use Android Data Recovery to get the lost Android data back.
