Samsung Galaxy S8/S8 Plus is much anticipated. Due to the setback of the sales and reputation caused by the controversial Note 7, there is no doubt that Samsung company will devote so much to this new iteration.
People Also Read:
● How to Recover Lost/Deleted Data from Samsung Devices?
● How to Unlock Samsung Galaxy S7/S6 without Passcode?
Perfect as the S8/S8 Plus is, I'm afraid it's not perfect at stopping unexpected snags. Though it's not a pleasant topic to mention data loss issue, it's important for all of us to prevent from any potential data loss. So far as I've been saying, why not take a look at these two ways to back up your Samsung Galaxy S8/S8 Plus.
Resort 1: How to Backup Samsung Data with Computer?
As an exclusive software designed to back up and restore data from Android devices supporting Samsung, LG, Sony and so on, I'm sure Android Data Backup & Restore will not at all let you down. Don't beat around the bush, let's see how it works.
Supported Data:
● Photos & Videos
● Messages
● Contacts
● Call History
● Audio Files
● Calendar
● App & App data (only for rooted devices)
Step 1. Get Started with Android Data Backup & Restore
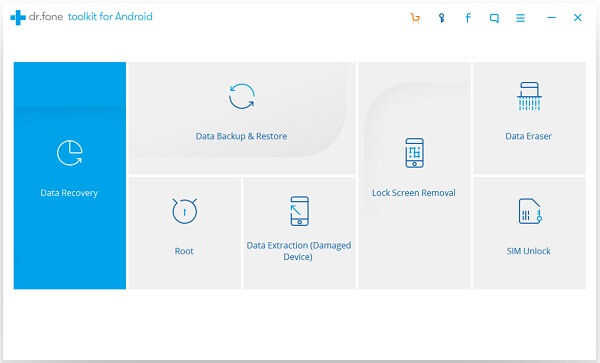
The first step is to download and install Android Data Backup & Restore on your Win/Mac. Next, launch the program and you will see such an user interface on screen. Please click and select "Data Backup & Restore".
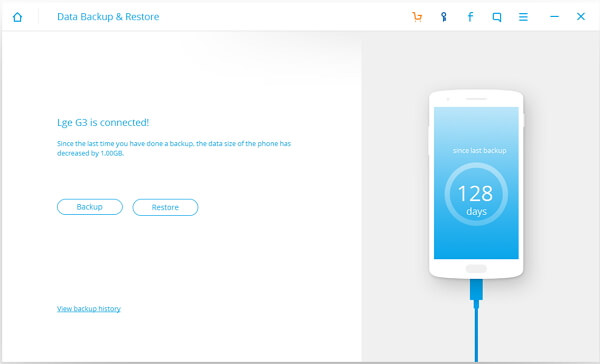
Step 2. Connect Samsung with the Software
Now, you will be prompted to associate you Samsung with the program, please use USB cable to connect both together. When the Samsung S8 is detected, give it a click on "Backup" button to proceed.
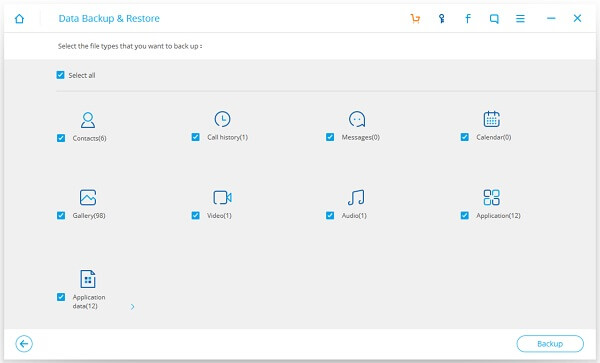
Step 3. Select Data to Backup
As you've seen above, Android Data Backup & Restore supported a variety of data. Therefore, you should make your choices on that screen. If you'd like to backup all the data, simple tick up the box before "Select All" and go with "Backup" at the right bottom.
Step 4. View Backup File
The process starts and your selected data are being backed up, which are stored somewhere on your computer. When you see "Backup has been completed", there are many ticks along with the "View the backup" button. If you click on it, you can directly check out those data transferred to your Win/Mac.

Resort 2: How to Save Content via Samsung Cloud?
Aside from the help of Android Data Backup & Restore, Samsung also offers a default service called 'Samsung Cloud' with limited 15 GB storage, which is similar to the "iCloud" of Apple Inc. It claims to "Bring your essentials wherever your Galaxy takes you" with three functionalities: Back up, Sync & Restore.Note that you should have a Samsung/Google account tied with your Samsung in advance.
Supported Data:
● Gallery
● Contacts
● Calendars
● Memos & Notes
● Recordings
● Call Log
● Device Settings
Step 1. Launch "Settings" app on your Samsung.
Step 2. Scroll down and tap "Cloud and accounts".
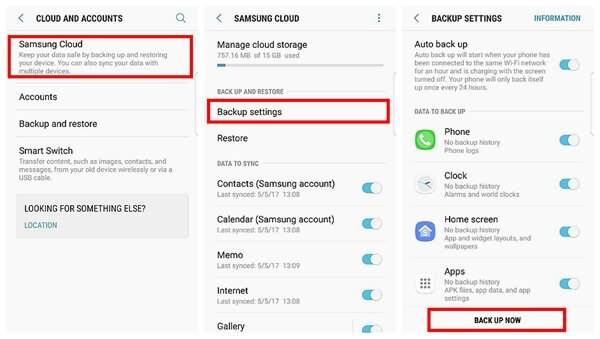
Step 3. Select "Samsung Cloud" for more settings.
Step 4. Tap "Backup settings", then enable "Auto back up" if necessary and toggle on the types of data according to your need.
Step 5. After done making your choices, tap "BACK UP NOW" to start backing up your data.Note that if you'd like to make a backup for content like "Contacts" and "Photos", you'd rather try "Sync" feature.
While having a backup, you'd no more be beset by data loss. However, don't forget to 'update' your backup from time to time.
