If you are looking for a safe and easy way to root Samsung phone or tablet, then you should go on reading. In this post, you are going to learn two reliable methods to get root access on Samsung devices. The methods are workable for different Galaxy models: Samsung S7/S7 Edge/S6/S5/S4/S4, Note 5/4/3, Galaxy Tab A/2/3/4.
Why Would You Like to Root Your Samsung Device?
Every user has their unique answers to the question, but in the end, it can all come down to one simple explanation: they want to change their devices in a way that is not allowed by original system. And by getting root access, they are granted the permission to do anything they want on the phone or tablet. Here are what users usually do after having Samsung device rooted:
1. Install custom ROMs with fabulous features that are unavailable on default ROM;2. Have complete backups of the entire phone/tablet;3. Get rid of Touchwiz with other themes and fonts;4. Access to more apps;5. Uninstall bloatwares.
Now you only need the following root methods to make all these wonderful features available for you.
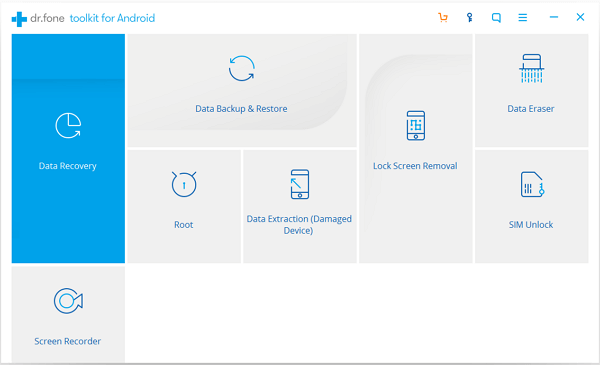
Root Samsung Phone/Tablet in One Click
The first tool that we introduce here is Android Data Recovery. The software is a whole package with features of android root, data backup & recovery, etc. With both Windows and Mac versions available, you can just plug your Samsung device into the computer and click one button to let the program give your root access. It is very easy-to-use so users who are new to rooting should love it.
Download and install the program on your computer.
Step 1. Prepare for Rooting
Backup files on your Samsung phone or tab that are important to you. To do that, use Android Data Recovery to make a full backup of your messages, contacts, photos, video, apps and more. Moreover, make sure your device has at least 20% battery left.
Step 2. Connect Samsung Device to the Program
Launch Android Data Recovery on your computer and choose "Root" from the multiple features on the main screen. Then connect your Samsung device to computer with USB cable.
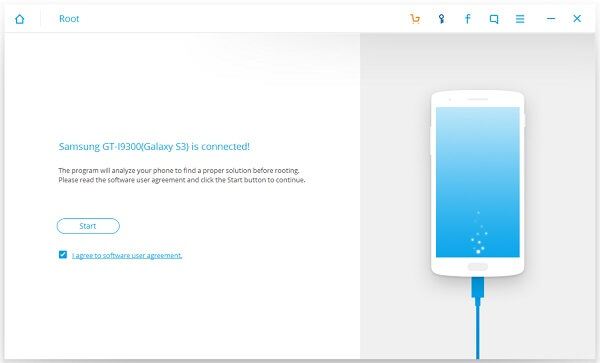
Step 3. Check Root Status
The program will automatically detect your device and begin to check the root status of your phone or tablet. If the phone has been rooted, you'll see:
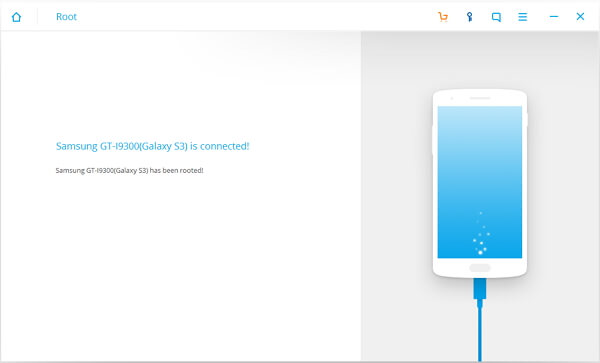
If not, click "Start" to continue.
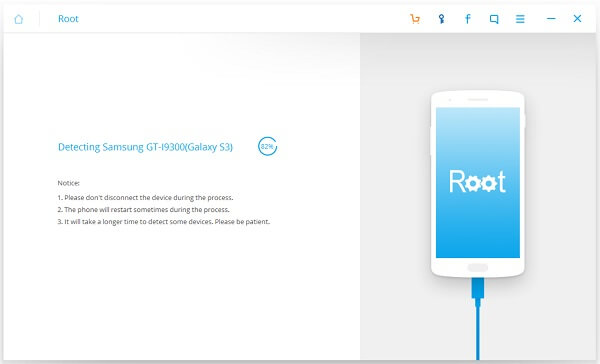
Step 4. Detect & Find Suitable Solution for Your Device
The program will start to detect details of your Samsung phone or tablet and find suitable root solution accordingly. During the process, you don't need to do anything but keep the device connected to computer.
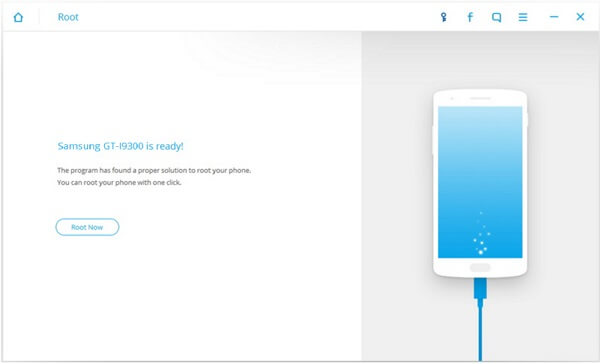
Step 5. Root Samsung Device in One Click
When you see "Root Now", it means that the program has fully prepared for rooting your device. Click "Root Now" and wait patiently until you see "XX(device model) root completed".
Root Samsung Phone/Tablet by Flashing CF-Auto-Root Package
Unlike the previous method, which will take care of everything for the users, using CF-Auto-Root package is much more complicated and it is recommended for advanced users who have been equipped with certain knowledge of root.
1. Backup your Samsung device to computer or somewhere.
2. The device should be fully charged or at least 80% charged.
3. Check the model of your device. You should find it in "Settings" > "About Phone (Device)".
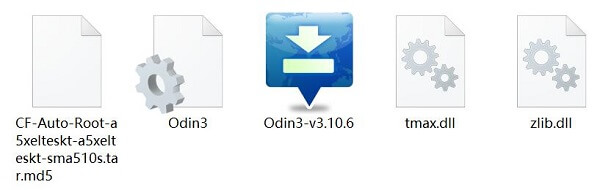
4. According to the model of your Samsung phone or tablet, find and download suitable CF-Auto-Root package
5. Unzip the downloaded file, and install Odin3 .exe file on your computer.
6. If you are using Android 5.0 or later, enable OEM Unlock on your Samsung device: Tap "Build number" seven times to enable"Developer options" and then toggle on "Enable OEM unlock" on "Developer Options".
7. Put Samsung device into Odin Download mode: turn off the device and keep holding Home + Power + Volume Down buttons until you see the warning window. Press Volume Up to enter.
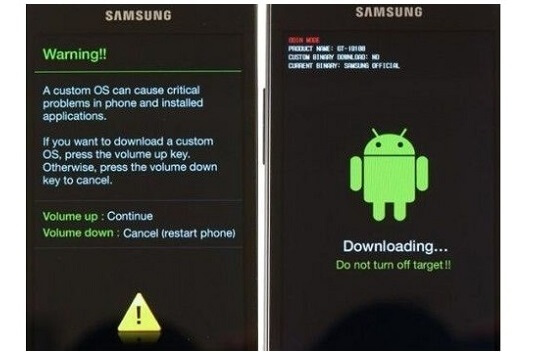
8. Open Odin on your computer and connect your Samsung device to the computer. The messages "Added!" will appear, showing that Odin has detected your device.
9. Click the PDA button and select the .tar.md5 file from CF-Auto-Root package. After adding .tar.md5 file, click "Start" to commence rooting.

Tip: Ensure that Auto-reboot and Factory Reset Time options are ticked before rooting.
10. When you see "Pass!", you'll know that the rooting process has been completed successfully. Your device will reboot in recovery mode.
11. Wait patiently until you see the home screen of your device, then disconnect your device with the computer.
Your device is successfully rooted. The first method works not only on Samsung devices, but others such as LG, Sony devices. However, the latter only supports Samsung devices.
