Rooting does give you a lot of options with what you can do with your Android device. For example, it allows you to Flash a custom ROM and Kernel, remove preinstalled crapware, block Ads in any App as well as boost your device's speed and battery life. However, just like every coin has two sides, to root your Android also has some risks:
1. If you don’t follow the correct guide or the instructions are not set up properly, your smartphone could turn into a brick, which is damaged permanently. Not one could fix it and your device would be useless.
2. Once you root your Android device, your warranty from manufacturer, retailer or carrier who sold you the phone would turn to void. It means that when your rooted device goes wrong, you can not get it to be fixed or part replacement.
3. You will not be able to update your Android version automatically from your manufacturer with the rooted phone. If you do want to get your device updated, you would need to get help from the new releases of custom ROMs.
4. After finish to root your Android, most of the users would install custom built ROMs on it. However, this kind of software which is designed by someone may not be always reliable. Different from the official download source, those ROMs you get from the Internet may have risks of losing your account information or your phone not being secure enough from attacks such as viruses.
But you can also get rid of these risks to some extent. First of all, before you begin to rooting process, please search the guide or tutorial on from the Internet and make sure you get the idea about how to root. If you don’t, it would be better to fine someone that can do this for you. What's more, download and install proper antivirus protection on your Android device may help to prevent your phone from attacks. And to restore the privilege of warranty from manufacturer for your rooted Android phone, you can unroot your device and make it look like you never root it. However, some of the Android device such as Samsung could not support it as it can be checked out the result of rooting even you have unrooted it.
Now you may get some knowledge about the rooting. I will talk about how to root Android and take Samsung, Sony and LG as examples. Please continue to read.
Part 1. How to Root Samsung?
Before you root your Samsung, for instance, Samsung S7 Edge, it would be better to make a backup copy for the important data on you device. And please note that maybe it is a little different for the guide as the device's model is not the same.
1. Enabled Developer Options on your device by going to "Settings > About" and tap the build number five to seven times.
2. Download Odin software, Mobile Device Drivers and the Chainfire Auto-Root file on your computer.
3. Enter the download mode on your Samsung S7 Edge by holding the Home, Power and Volume Down buttons.
4. Lauch Odin on your computer and then plug your phone into PC via the USB cable that is matched. If you can see the pop-up window with "added message", it means that you have connect it successfully.
5. On the interface of the program, please click "AP" button and choose "tar.md5 file" from the unzipped file from Chainfire Auto-Root file. Then on the left pane, select "Option > Auto-Reboot and F.Reset Time" and please make sure you uncheck "Re-Partition".
6. Click "Start" button and wait for a moment. Then the job is done!

Part 2. How to Root LG?
If you don’t want to root your LG with the third-party program, you can also achieve the result with some ADB commands. But if you want to finish the job in an easy and simple way, you can also try root LG with One-click Root .Note: Before you root your device, you need to unlock the bootloader first by getting the code from LG.
Part 3. How to Root Sony?
How to Root Sony?Before you root your Sony, you need to aware that your bootloader is locked. But it would be ok to unlock it officially. Please follow the guide to root your Sony(take Sony Xperia Z5 as an example).1. Get unlock key from Sony and then unlock the Bootloader.2. Download and install TWRP and SuperSU on your device.3. Restart your phone and enter Recovery mode.4. Then tap "Install" option.5. Navigate to Settings>SuperSU-v2.67.zip file and do a swipe to confirm option.6. Reboot your Sony Xperia Z5 and the job is done.
Tips: Root Androd Device with Android Data Recovery
Although you can try the different ways to root your device, it is ineffective and sometimes it may take you a long time to root. Now I want to recommend a method that can also fit will all the models of Android in a very simple way. Just several steps, and you can get a rooted Android phone.
Step 1. Download and Install the Android Data Recovery
First of all, download and install Android Data Recovery on your computer by clicking the download button below. After that, please launch it!
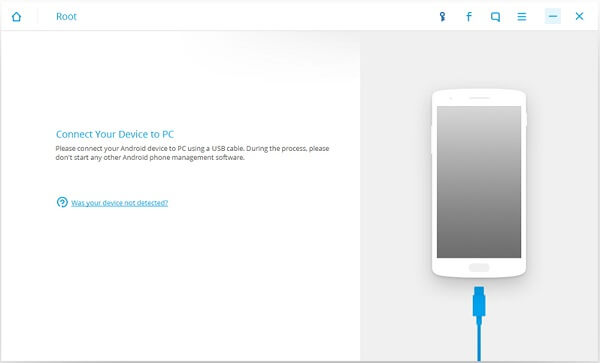
Step 2. Plug Android into PC
On the interface, please go to Android Root" and then plug your phone into your computer with the USB cable that is matched. Note: Enable the USB debugging on your device is a must-do step to get your phone connected.
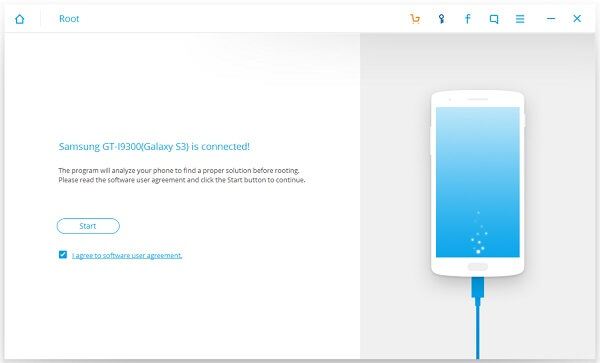
Step 3. Detect Your Android Model
Before the program detect your Android model can be supported or not, it would scan it and check your phone’s status, which you can see if your device is rooted or not. If it is not rooted, the program would continue the process.
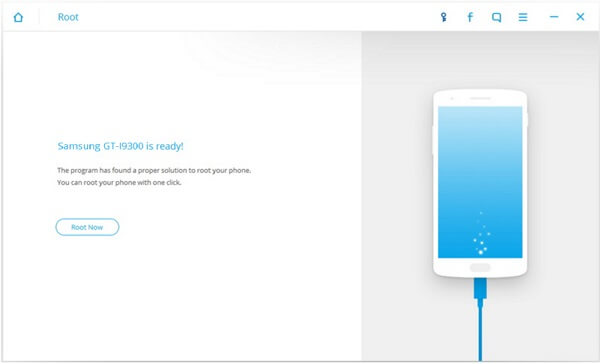
If your device is supported, you can see the screen as below. If you have no idea whether your Android can be supported or not, please just download the trial version and have a try!
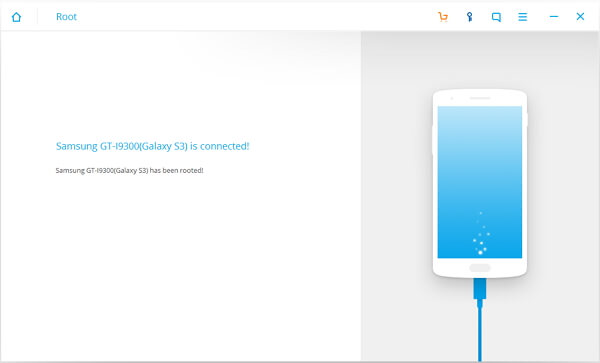
Step 4. Root Your Android
You are able to begin to root your phone by clicking "Start" button on the interface of the program. After that, it would root your Android automatically. Wait for a moment and the job is done.
Any question please feel free to contact us!
