Question from Jennifer: "Are there any easy steps to recover photos from iPad? Preferably the most economical way that works."
Detailed Problem: "I thought I had transferred personal family photos and work related photos from my iPad Pto to the computer, and then I deleted them from the iPad. But I was in a rush. And I can only assume I never do copy to my computer, because they are nowhere to be found (I have searched my hard drive). My trash has been automatically deleted everything I put in (I didn't tell it to do that). So they're gone."
How did Jennifer eventually solve this problem? Yes, she has used iPhone Data Recovery. iPhone Data Recovery is a tool assisting you to recover your deleted/lost items in iDevice containing photos in jpg, jpeg, png format and etc. With intuitive interface and simple operation, the program has been trusted by its users. Have an experience, you will be attracted by this economical and efficient stuff.
Part 1. Directly Retrieve Pictures from iPad
Note: For iPhone 4/3GS, iPad 1, iPod touch 4, media such as Camera Roll, Photo Stream, Photo Library, and App Photo can be directly restored from iDevice. New models should turn to the other two modes.
Step 1. Plug iPad to PC or Mac
To begin with, connect your iPad to Windows or Mac with a USB cable which came with it. The program will automatically enter the first mode--Recover from iOS Device with iOS 9.

Step 2. Start Scannning iPad
Click the blue Start Scan button and enable a data scan. All the deleted data including your photos will be detected and found. The process can take some time. Please wait for the result with patience.

Step 3. Preview and Recover Photos
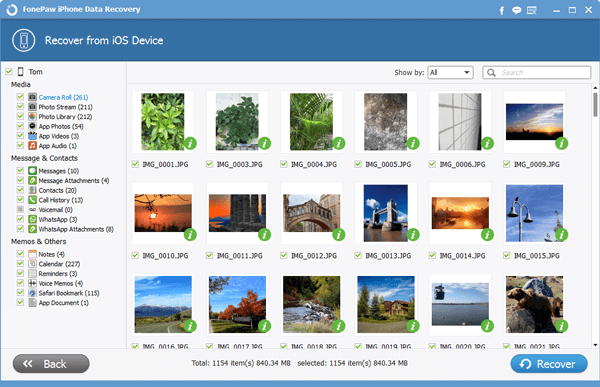
Now the scan is completed. Your data will be orderly listed on the left menu. Click Camera Roll for further preview. Your pictures will be displayed on the screen. Then tick and choose the ones you are going to retrieve and then the Recover button.
Part 2. Restore Images from iTunes Backup
Step 1. Scan iTunes Backup
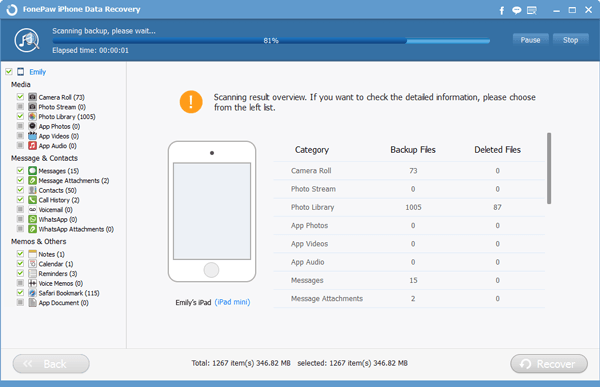
Select Recover from iTune Backup Files Mode. Then tick contents you want to get back and click Start Scan to conduct a scan.
Step 2. Recover Photos from iTunes Backup
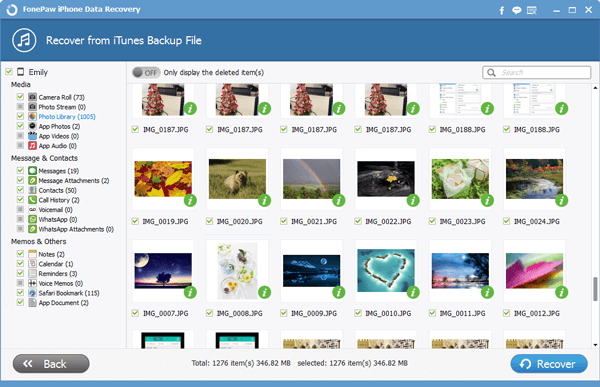
With the scan done, interface appears as below. You can selectively tick images need restoring. Then click Recover and save them on your computer.
Part 3. Retrieve Photos from iClouds Backup
Step 1. Sign in iCloud
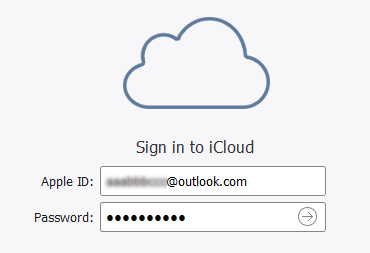
Choose Recover from iCloud Backup. Then key your Apple ID and the password to sign in. Don't worry about any info leak. Our software is information secured.
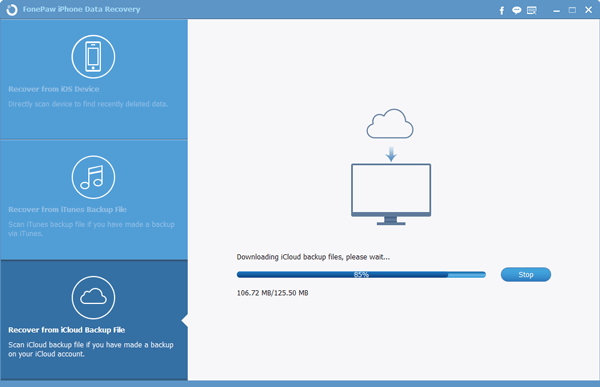
Step 2. Download Images from iCloud
In this step, click Download and get your previous backup from iCloud.
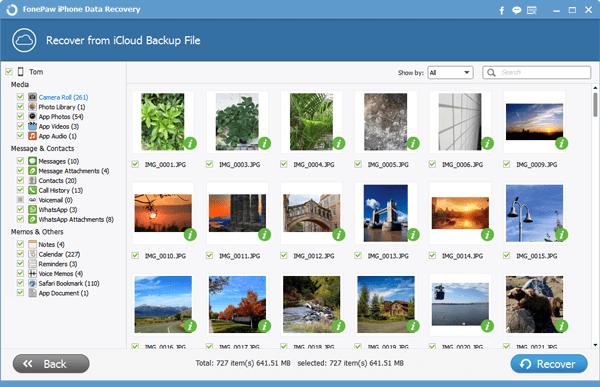
Step 3. Regain Photos from iCloud Backup
Now you can preview pictures. Then choose your wanted items and then click Recover to store them in your computer.
Warm tips for you:In case of any data lost, it is advisable to have a backup of your important files.
How do you think of this program? If you like it, just share with others. And your comments are welcomed. If you encounter problems when attempting recovering iPad Pro/ Mini 4 photos, just write a message and inform us.
