Question from iPhone User:
--"Any ways to recover call history on iPhone 7, please? My friend called me with his new number and I forgot to take it on contact. And the call history was cleared. How can I restore them so that get my friend's number?"
Answers by Respondents:
--"Sorry, I'm pretty sure this is not possible."
--"Turn to an expert!"
--"Apple Store may help you."
You may always see such dialogues in Apple Support Communities. The question is followed by all kinds of answers. But when it comes to how to recover call history in iPhone 7, iPhone Data Recovery first occurs in my mind. The program performs as an assistance to recover your iPhone data such as call history. You can retrieve your deleted cellphone records including the contact' s name, number, calling date, and so on. Now, follow the guide and experience it.
Section 1. Directly Recover Cellphone Records from iPhone
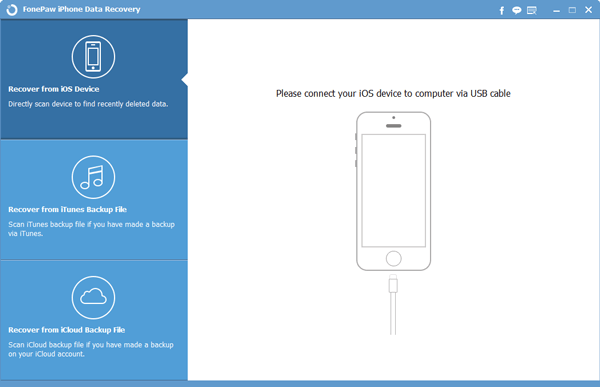
Step 1. Link Your iPhone to PC
Install iPhone Data Recovery from our website and run it. The trial version is free. The interface as below shows. Please connect your iPhone to a computer with USB cable.
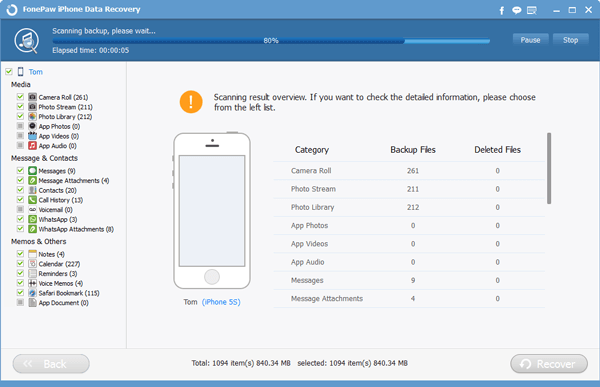
Step 2. Start Scan Deleted Call History
When you have successfully linked your iPhone to your computer, you can click Start Scan to enable scanning. Please notice that if your iDevice is iPhone 4, iPhone 3GS, iPad 1, or iPod touch 4, the window will remind you to choose Standard Mode or Advanced Mode(Recommend). To regain cellphone records, Standard Mode is your option. When the scan begins, please wait for a while.

Step 3. Preview and Regain Your Phone Logs
Now, you can have a look at the category. The software allows you to view more detailed information by pressing Call History from the left list. Names, phone number, calling date are involved in the overview. After that, you can tick your needed cellphone records and regain it.

Note: You need to turn to a backup if previous data is overwritten. Such situation always happens when you reset your iPhone, repaired it, or continue to use it after the data lost.
Section 2. Restore Phone Logs from iTunes Backup
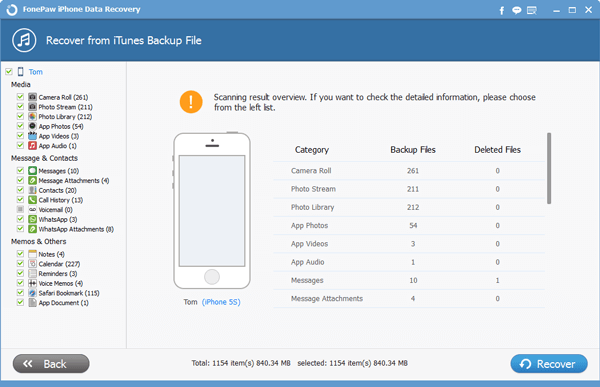
Step 1. Scan iTunes Backup Files
Choose the second mode--Recover from iTunes Backup Files. Click Start Scan to start the scanning. Now await the scanning results.
Step 2. Preview and Restore Cellphone Records
Scanned results are showed on the screen. You can preview the phone logs in detail. And you can selectively choose your target items.
Section 3. Retrieve Call Records from iCloud
Step 1. Sign in iCloud
Choose Recover from iCloud Backup Files. Input your Apple ID and the right passwords. Click the arrow and enter iCloud. The program is informational secured with no info leak.
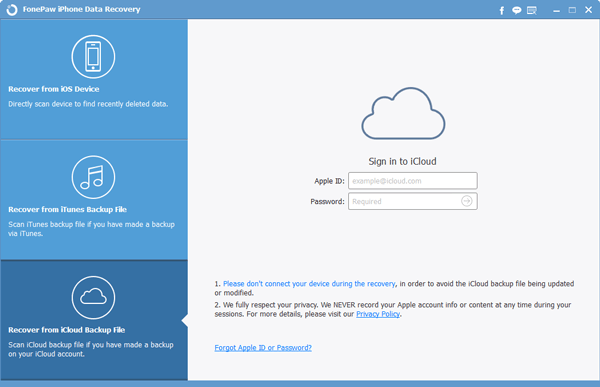
Note: Always remember your Apple ID and passwords. The ID is a vital approach to sync data and make a backup.
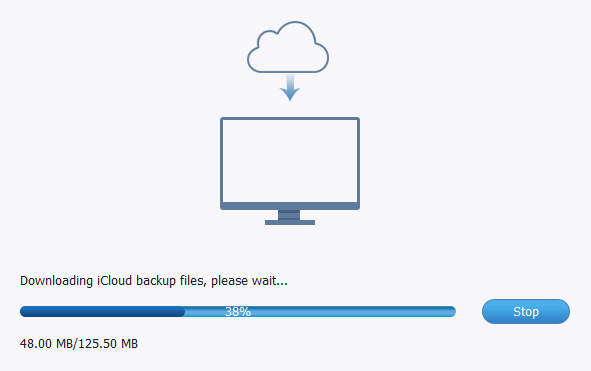
Step 2. Download iCloud Backup Files
Download your iCloud backup files online. During this process, please keep your peripheral online and patiently wait for the scanned result.
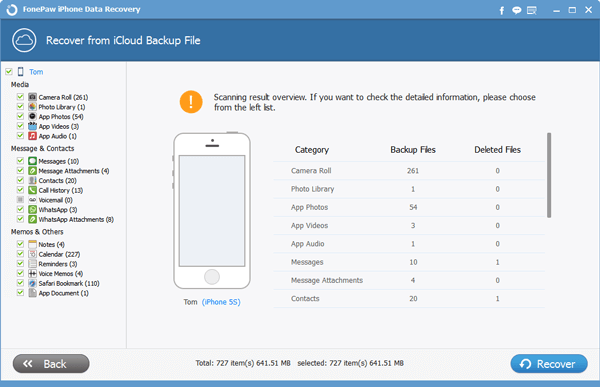
Step 3. Get Cellphone RecordsBack from iCloud
When your files on iCloud is entirely downloaded, you can start scan and preview the results. Then you need to select your needed data among all the items and click Recover to retrieve them. All the recovered call history will be automatically saved on your computer.
Warm Tips: For your smooth recovery, always prepare a backup of your call history.
A deliverer, uh? Yes, iPhone Data Recovery is created to come to your rescue and satisfy your needs of iPhone/iPad Mini 4/iPad Pro, etc. To make further progress we are delight to receive your comments and questions.
