In the music library of your Android phone, there can be no less than 1000 songs, which come from different sources in succession. Some of them are downloaded online while others are transferred from other Android handsets via USB cable, Bluetooth, NFC, etc. Whatever! The thing is that, with tons of music in the library, it is a mess. What you need to do is regularly manage Android music files, for example, fix music tags, fix covers, delete duplicate songs, and more.
To manage your music library, it is a good idea to turn to TunesGo, a music management program.This software can help you clean up and organize all music items in your Android handset. In addition to fixing tags, cleaning music tracks, etc., you can also backup stuffs in the library. Download the program and have a try.
Part 1. Backup Music from Samsung
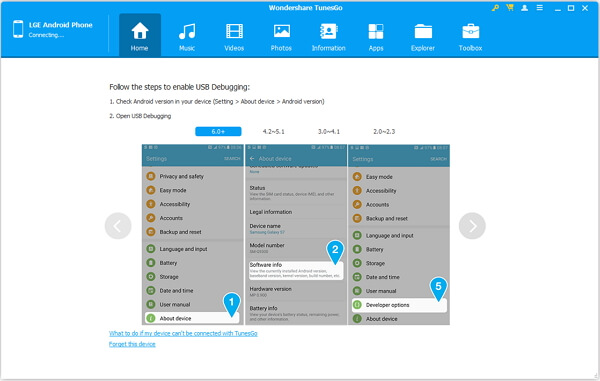
Step 1. Connect Android Phone to PC
Run TunesGo on your Android phone. Then plug your Android handset to the computer with a USB cable and enable USB debugging on your Android phone.
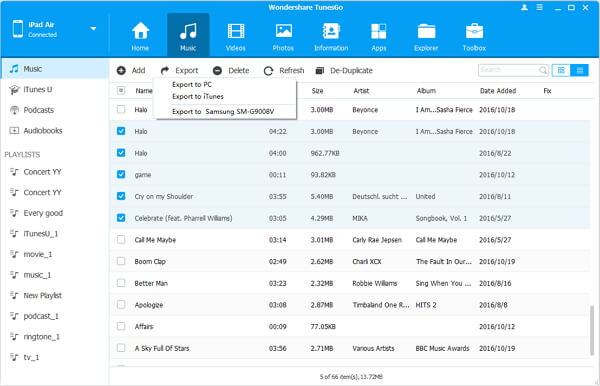
Step 2. Backup Music to PC
When your phone is detected, hit "Music" and the songs will be displayed at the screen. Select the songs you need and choose "Export" > "Export to PC".
Part 2. Fix Music ID3 Tags
Step 1. Transfer Android Music to iTunes Library
Run TunesGo on your computer. Connect your Android phone to the computer. Then enable USB debugging on your device. When your phone is connected, on the upper panel, select "Music".

Step 2.Fix Music Tags
Choose the song that you find information missing. Then click the "Edit" button in the end. You can then edit the Name, Artist, Album, Genre, Year and Track of the song on the right. Also, you may simply click "Identify" to let TunesGo fix missing ID3 tags automatically.
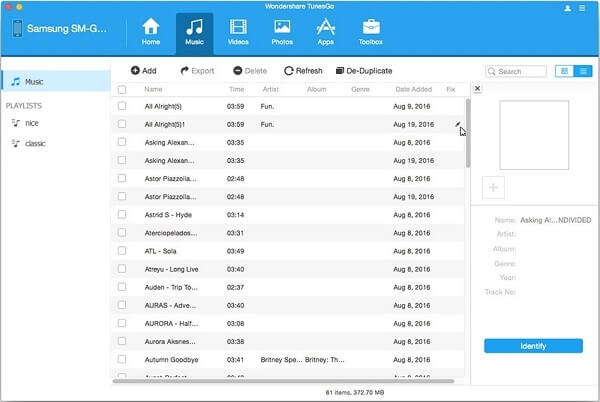
Note: The feature is now only available on Mac version of TunesGo.
Part 3. Manage Playlists
Step 1. Add/Delete Playlists
Open TunesGo on your computer. Next, connect your Android phone to the computer. When the phone is connected, choose "Music". On the left panel, choose one playlist and right click, then you'll have option of creating new playlist, rename the playlist or delete the playlist.
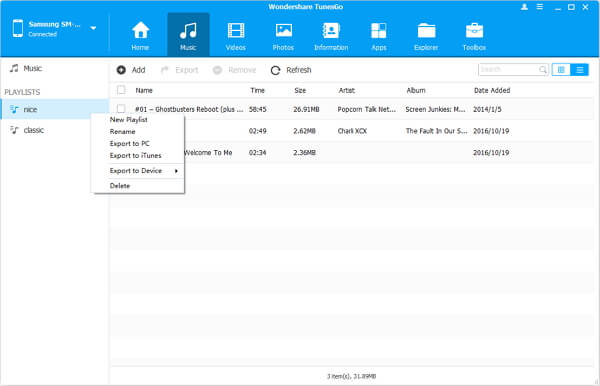
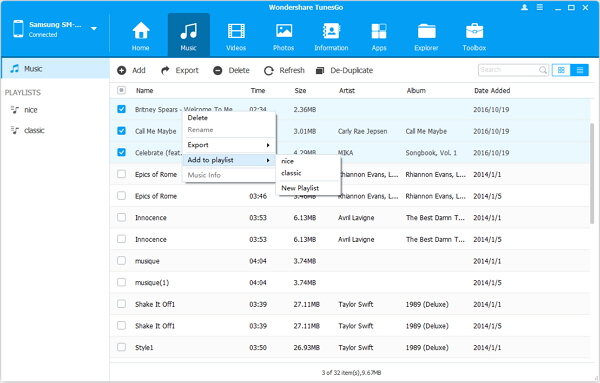
Step 2. Add Songs to Other Playlists
Choose a song and right click. Move the mouse cursor over "Add to playlist" and you'll see all playlists on your phone. Choose the one you want and song will be added to the playlist.
Part 4. Delete Duplicate Songs
Step 1. Connect Android Phone to PC
On your computer, run TunesGo. Then plug Android phone to your computer. When the phone is detected, click "Music" and you will have the below interface. Please select "De-Duplicate".
Step 2. Delete Music Duplicates
TunesGo have found duplicates in your Android phone. Check the "Delete Duplicates" button and remove items you don't want.

Part 5. Delete Unwanted Songs in Bulk
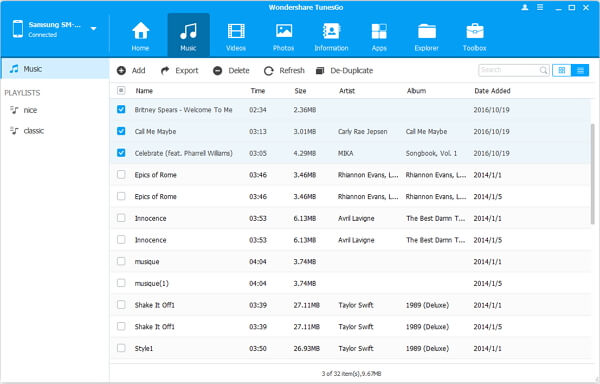
Step 1. Select Songs to Delete
Open TunesGo on your computer. Then connect your Android device to your computer. After that, select "Music". From the songs listed, tick the songs you need and click "Delete". Or you may tick the blank next to "Name" to select all songs to delete.
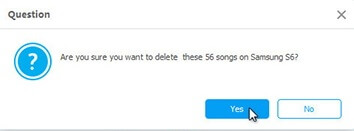
Step 2. Verify Your Choice
On the pop-up window, click "Yes" to verify your choice and the songs you selected will be removed from your Android phone.
Now tracks in your music library are orderly organized. If you want to enjoy music in a portable handset, you can transfer these songs from PC to Android with TunesGo. Got any of your own tips for crafting the perfect music library? Share them with us in the comment box.
