"I want to transfer some of the photos to my Samsung Galaxy S7 edge, which I received and saved on my laptop running Windows 10. There are over 300 pics. How can I import them to my phone with ease?"
People Also Read:
● How to Retrieve Deleted Photos on Android?
● How to Transfer Photos from Android to Android?
Photos are somewhere memory survives. More than that, photos can give a direct and visualized picture to watchers so that feelings or things we tend to convey can be easily taken in and understood. That's why pictures are so important in our life and at work. Sometimes, you might need to transfer photos from Windows/Mac Computer to your Android phone for some reasons. However, how to do it? That could be much easier even than you expect. Here's the guide.
Part 1: How to Selectively Transfer Photos to Android from PC?
Android Transfer - TunesGo is a must for Android users to manage various data on a cell phone. As an easy-to-use Android File Transfer tool, it allows to transfer and manage data including Music, Ringtone, Videos, Movies, Photos, Contacts, Text Messages, Apps, and SD Card Content on quite a range of devices:
- Almost all Android Phones like Samsung, HTC, Nexus, Pixel and more
- Most models of iPhone/iPad/iPod like iPhone 7/7 Plus, 6s/6s Plus and more
- WindowsPC on Win10/8/7/XP
- All Mac supported running macOS X/Captain/Yosemite/Sierra
Here let's see how it works to import images from PC to Android:
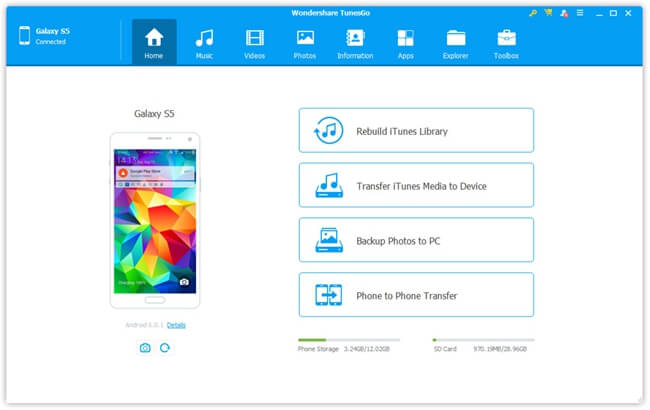
Step 1. Install Android Transfer - TunesGo
Give it a click to download and install Android Transfer - TunesGo on your Win/Mac. Then, run the software and use USB cable to hook up to the computer. Your Android phone must have USB Debugging enabled so as to be detected via the program.
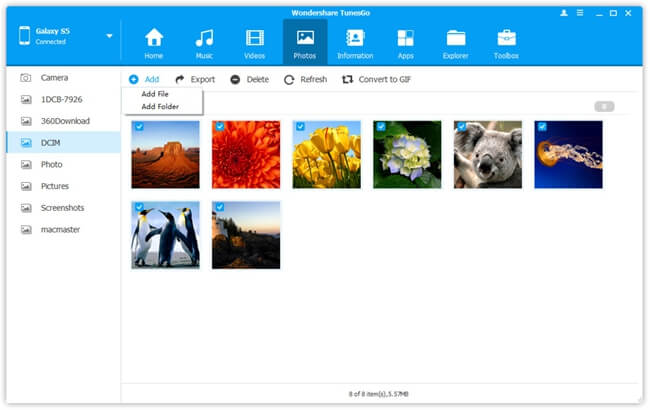
Step 2. Add Photos from Computer
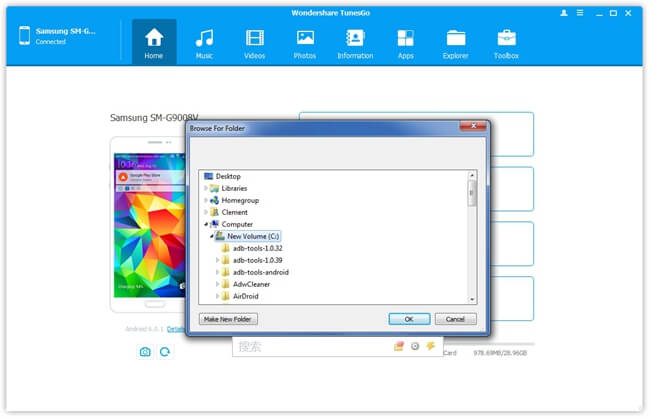
After your device is connected, you can choose "Photos" in the top panel. The software will start scanning and loading all your photos out. Now, please click on the "Add" button and choose "Add File" or "Add Folder". Then, navigate to the desired files and import them to your device.Note that there is an access - "Convert to GIF" in "Photos" page to help you make interesting GIFs out of your own photos.
Pros:
1. You can selectively add pictures one by one by "Add File" or transfer batch photos by "Add Folder".
2. Various data and devices running Android and iOS supported.
3. Extra useful tools provided, including Backup & Restore, Photo to Phone Transfer, Convert Photos/Videos to GIFs, Once-Click Root, Ringtone Maker and so on.
Part 2: One-Click to Back Up All Photos to Computer for free
Also, it's recommended to back up your Photos from time to time in case some be lost. Luckily, Android Transfer - TunesGo offers a totally free way for users to back up Android photos with one click.
You might probably already notice this function at the time when your Android is connected to the software. Yes, there is a shortcut available on the "Home" page. Also, you can find the "Backup Photos to PC" option within "Toolbox". As the name says, you just need to click on the button and choose a folder on the computer to store images. Then, it starts transferring your photos to the target location without a hitch. The process completes with a message - "Export Successfully".
Part 3: What to Do When Photos are Lost Without Backup?
There is a sad story that people might find photos lost or they deleted some images by accident before they realize the importance of a photo backup. Would it be too late to get lost/deleted photos back? It depends on whether or not you keep using the phone for long. If you stop writing in data in your Android or the photos just got lost in a few days, it's highly possible to retrieve these photos with Android Photo Recovery. Here's the tutorial, please take a look.
Step 1. Download and install Android Photo Recovery on your Win/Mac computer.
Step 2. Connect your Android to it and enable USB debugging on Android.
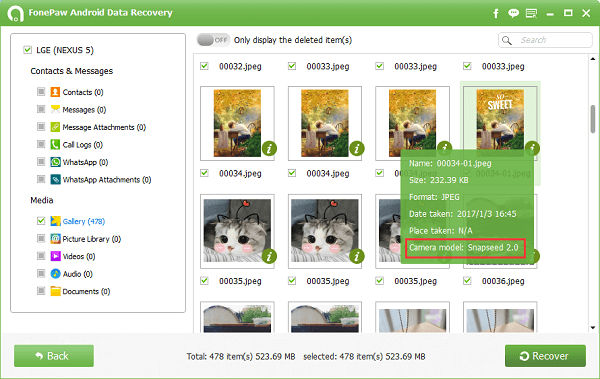
Step 3. Select the "Gallery" option and click "Next".
Step 4. On your Android, tap on "Allow" for confirming the authority.
Step 5. Check out photos that are just scanned out.
Step 6. Make your choices and click on "Recover" to restore pictures to the computer.
There is a free trial version available. Please give it a shot. If you're still having other problems, I'm sure you would find a desirable answer on Android-Recovery.net. Enjoy your day.
