"OMG! Any chance I can recover my photos, videos and music on Android? I was thinking about flashing a new ROM. So I did it, assuming that my files are all backed up the other day. The thing is that I don't have those new contents copied to my computer."
- How to Recover Deleted Photos & Videos from HTC Desire
- How to Recover Deleted Data from Android Internal Memory
Have you ever encountered with that? Really awkward situation. And for those who are now seeking for solutions to picture/music/video recovery for Android, this is the very guide you need, to get back lost data due to deleting, rooting, ROM flashing, data transfer failure and many other reasons. To start with, you have to download this software, Android Photo Recovery, and, of course, a USB cable. When all are prepared, you can easily restore the deleted photos, videos and music, WhatsApp history and so on.
Android Photo Recovery is an excellent app on both Windows and Mac.
- Retrieve missing files from both internal storage and external memory card;
- Works well with various Android OS's from Android 6.0 to 2.1;
- Supports most Android models, including Samsung, Sony, LG, Google Nexus, HTC, OnePlus and more;
- Supports the recovery of all types of media files, e.g. songs in formats of .wav, .mp3, .vox, .raw and more.
Feel free to try out this wonderful program.
An Easy Way to Recover Photos, Videos and Music from Android
Note: If you adds more pictures, videos or songs to your Android, your deleted media files will be unrecoverable and replaced by the new data. So please reduce the use of your phone after losing files.
Step 1. Plug Your Android to PC and Enable USB Debugging
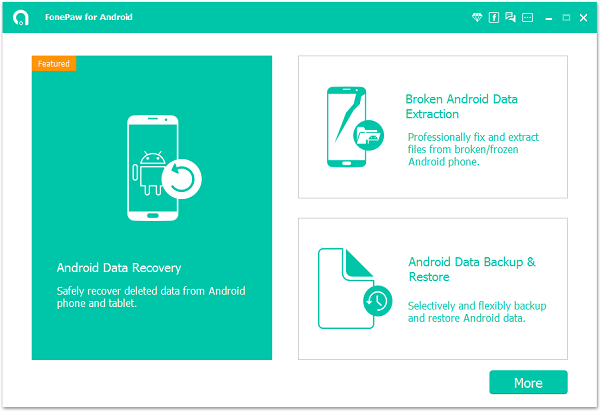
The first thing is to launch Android Photo Recovery. You will be prompted to connect the phone to computer.
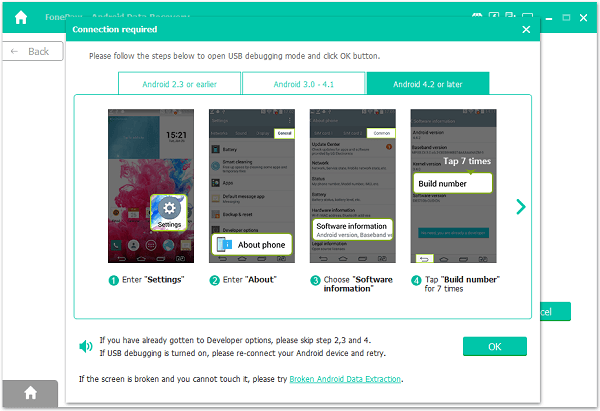
The second thing is to check USB debugging on your phone. When you have done that, the interface will automatically turn into the next step. The procedures are as the following under different OS's.
1) For Android 5.0 or newer: Move to "Settings" > "About Phone" to tap "Build number" seven times for "You are now a developer!" signal. Then, move to "Settings" > "Developer options" to turn on "USB debugging"
2) For Android 4.2 to 4.4.4: This version should be operated in the same way as Android 5.0.
3) For Android 3.0 to 4.1: Enter "Settings" > "Developer options" to set up "USB debugging"
4) For Android 2.3 or earlier: Tap "Settings" > "Applications" > "Development" > Tick "USB debugging"
And then, press "Start" on the next screen to continue.
Step 2. Choose Which Kind of Android Data to Recover and under What Mode
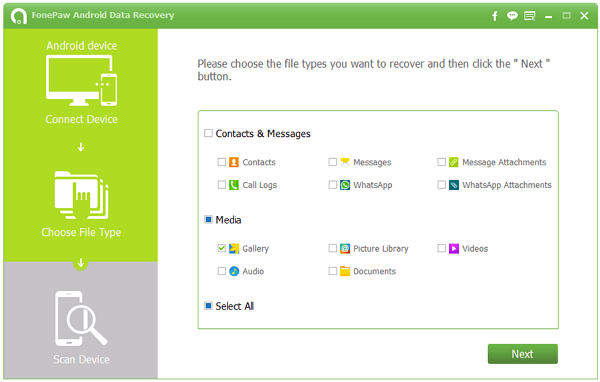
This is where you select file types. We can only check Gallery, Audio and Videos. (Some pictures may be in WhatsApp messages& attachments. Tick it if you want.)
Step 3. Begin Scanning Deleted Android Files
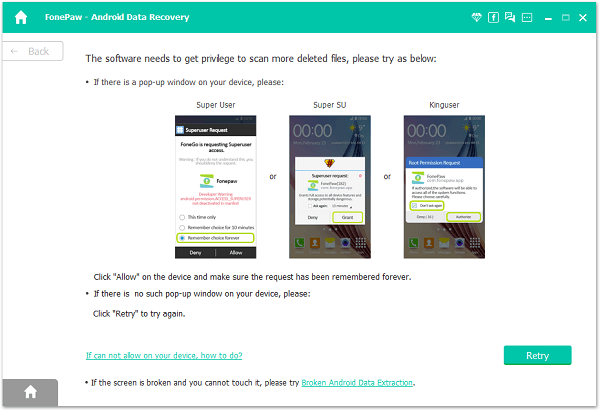
On a rooted phone, Superuser will ask for authority. Tap "Allow" until the interface does not pop up again. And then press "Start".
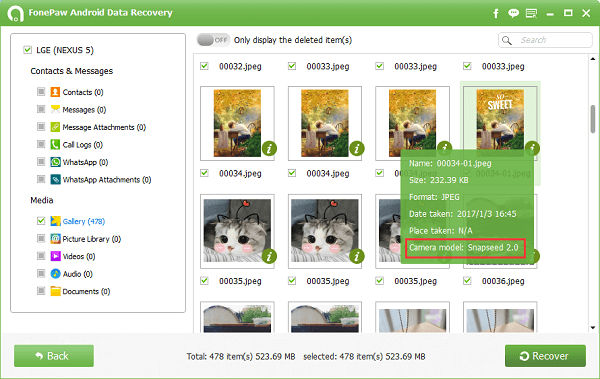
Step 4. Preview Android Photos and Recover Them
Scanning result can be seen as below. Pictures are ready to be checked. Tick in the corresponding boxes or simply choose them all. To undo delete Android video/picture/music, tap Recover button. The program will recover and store images, videos and audios in the computer.
Now, you have recover photos, music and video from android and use Android Manager to restore with this backup file.
Note: Performing a backup regularly will do you good when you need to find the old data back.
Tip: Where Are Your Android Photos, Videos and Music Stored?
If your phone doesn't have an external storage, your media files such as photos, videos, music are stored in the internal storage of your phone. For example, you can find camera photos in /storage/emulated/DCIM/Camera, videos received from WhatsApp in the route like /storage/emulated/WhatsApp/Media/WhatsApp Video.
As our phones usually have limited space and photos, videos and music often consume the most storage space, many users would like to get more space with an external SD card if the phone supports external storage. After inserting an SD card in the card slot, you can transfer your photos, videos or audio files to SD card or set the SD card as the default location. For example, on Galaxy S4, you may tap on "Setting" in the Camera app, and choose "Storage" to change the location from "Device" to the "Memory Card". After that, the photos you take will be saved in the SD card. That'll really help to free up your phone memory.
