"I was upgrading my Samsung S5. However, it took longer than I expected and finally the battery run out. Now, when I recharge my S5 and turn it on, the screen shows 'Firmware Upgrade Encountered an Issue. Please select mode in Kies & try again.' Does anyone have an idea how to fix this issue?" - From Androidpit
People Also Read:
● [Solved] What to Do When USB Debugging Greyed out?
● [Fix]Samsung S6 Stuck in Black Screen/Startup Loop/Odin Mode
This case is common and boasts the average 4,400 searches per month. Just in case you don't know. "Firmware upgrade encountered an issue" occurs when you're trying to root your device, or flash a ROM/Kernel, or simply upgrade Samsung Galaxy/Note phone to the latest Android, but the process doesn't go your way, which results in being stuck on this screen.
Though it's worth trying to give your Samsung a fresh restart so as to solve this issue, this way doesn't come to help you out all the time. If, unfortunately, it fails, there are FOUR feasible methods for you to try out with or without Samsung Kies.
Method 1: Reset Samsung to Factory Settings
If you got stuck in this screen now and then without any sign, you might consider resetting your Samsung phone to factory settings in order to get rid of this annoyance. Please go to "Settings" > "Backup and reset" > "Factory data reset". Then, wait until the process gets done. However, if you cannot access the screen, please try the following way. Note that this method will result in all data loss, so please make a backup for Samsung in advance.
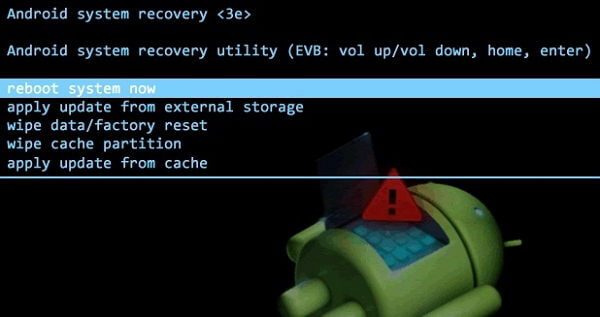
Step 1. Press down "Power" and "Home" buttons until the screen turns off.
Step 2. Hold down "Power", "Home" and "Volume Up" buttons together until the Samsung logo screen shows up.
Step 3. Choose "wipe data / factory reset" from the menu on the screen.Step 4. Wait until the process is done and see whether the issue is settled.
Method 2: Fix Firmware Issue with Samsung Kies
Before we start with Samsung Kies, you should download and install it on your computer at first. Also, please take out the battery from your Samsung and note down its "Model name" and "S/N number". Now, let's kick in.
Step 1. Launch Samsung Dies and associate your Samsung device with it.
Step 2. Select "Tools" at the top and choose "Firmware Upgrade and Initialization" to go on.
Step 3. Enter "Model Name" and click "OK" to go on.
Step 4. Next, enter the "S/N" number and continue with "OK".
Step 5. Now, click "OK" button and Kies starts to download the matching firmware upgrade components for your device.
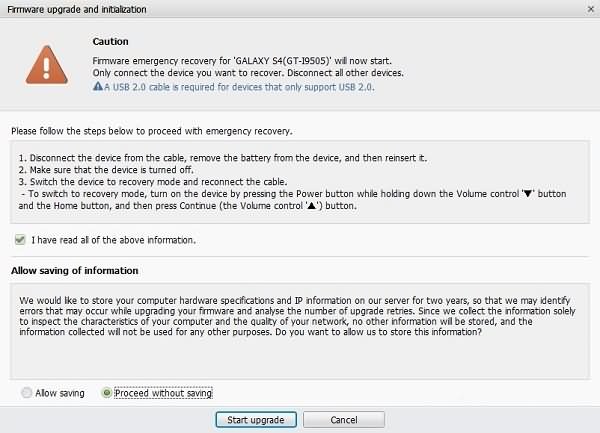
Step 6. When done, please read the "Caution", follow the onscreen steps and allow saving of information. Then, hit the "Start upgrade" option.
Step 7. It takes time (at least 30 min) to re-install the firmware on your device. When it completes, you will be prompted that "Emergency recovery of firmware completed".
Method 3: Try Android Recovery to Auto-Fix the Problem
If other methods seem intricate to you, here's the simplest way you should give it a look. With the help of Android Data Extraction, simply via selecting your fault screen type and device information, the software will do the rest for you. Bonus tip: it also works on other screens of death issue. For an overall idea, please check out the following steps.
Supported Samsung Devices:
- Samsung Galaxy S4/S5/S6;
- Samsung Note 3/Note 4/Note 5;
- Samsung Galaxy Tab Pro 10.1;
Step 1. Get Down to Android Data Extraction
Above all, you should download and install Android Data Extraction beyond doubt. After the installation, please click on "Fix Device" to proceed. Also, you can restore existing data from Samsung in advance in case something unexpected happens.
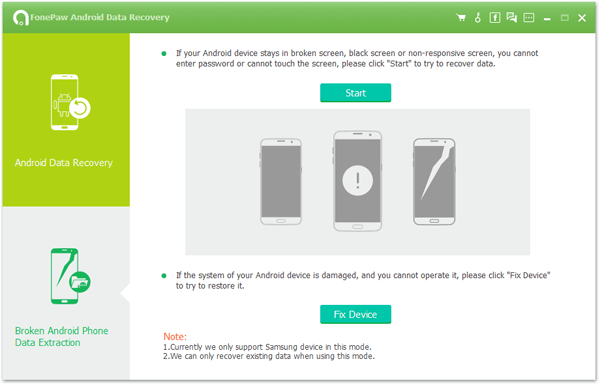
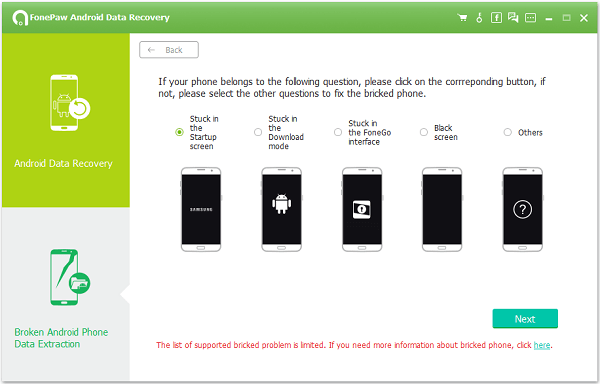
Now, you should select the fault type, say, the situation you're facing. According to your case, please highlight "Others" and click "Next" to go on.
Step 2. Confirm Samsung Info
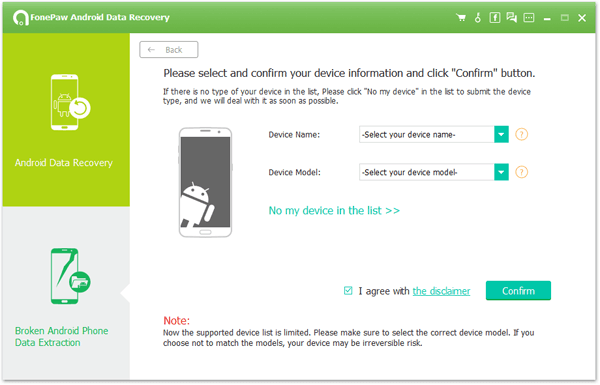
Please select the related "Device name" and "Device model" from the list and check out the "Disclaimer". Then, click "Confirm" to continue.Note that if you cannot see your device info in the list, please click "No my device in the list" to submit your device model. I'm sure it will be coming soon.
Step 3. Boot Samsung into Download Mode
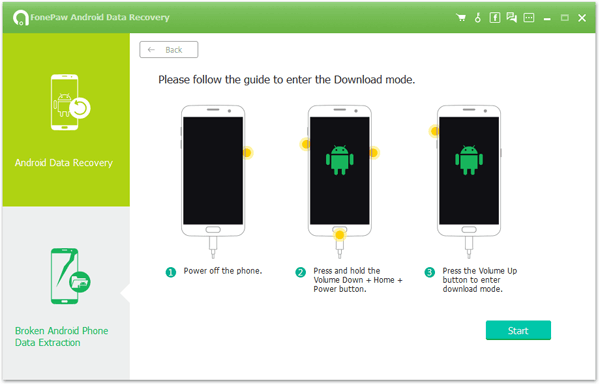
To fix the issue, Android Data Extraction needs to download the recovery package onto your Samsung Galaxy/Note. To download the package, you have to put your Samsung into "Download Mode". Please follow the instructions as below.
1. Power off the phone.
2. Press and hold the "Volume Down", "Home" and "Power" buttons at the same time.
3. Press the "Volume Up" to enter Download mode.
Step 4. Fix Firmware Upgrade Issue
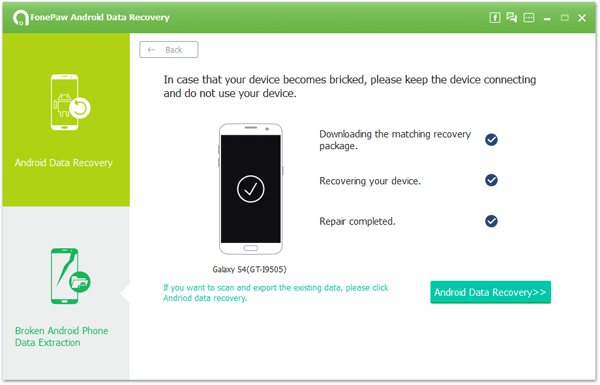
When Samsung enters "Download Mode", please click "Start". Now, the process will perform automatically. Please take your time and wait till it's done. Then, enjoy!
Method 4: Use Odin to Flash a New ROM on Samsung
Another workaround worth trying is to flash a new ROM on your Samsung. However, it's a bit complex, so make sure that you'll follow the exact steps here. Before we start, please ensure that you read out these three requirements.
1.Please download Odin3 on your computer at first.
2.Please uninstall Samsung Kies, because it usually interrupts the process.3.Please make sure thatthe Samsung USB driver is probably installed.
Steps to Flash a ROM on Samsung Galaxy/Note
Step 1. Download Related Firmware
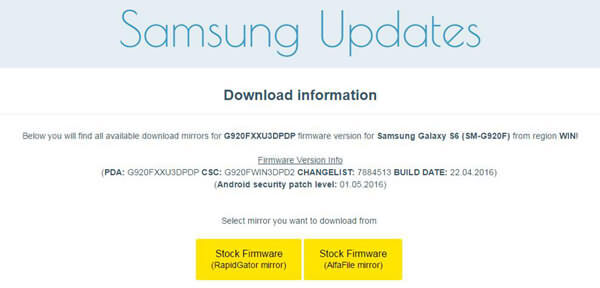
Above all, you should download a related firmware package onto your computer. Please open Samsung Updates on your browser. According to your device name and model, check out and download the correct firmware. After done downloading, you'll get a file with the extension .tar. Note that if you don't know your device model, just take a look at the back of the battery.
Step 2. Put Samsung into Download Mode
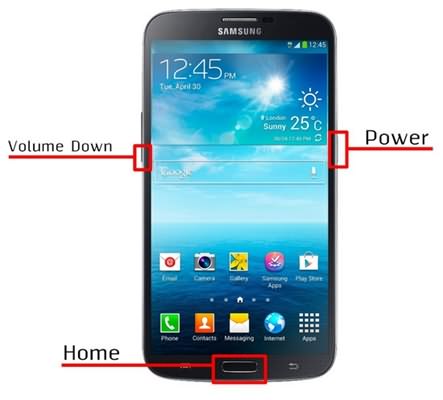
Now, Samsung should enter "Download Mode". Please do as followings. Turn off your Samsung phone manually. After that, press down the "Volume Down", "Home" and "Power" buttons together for seconds. Then, hold down the "Volume Up" to enter "Download mode".
Step 3. Run Odin3 and Start Flashing
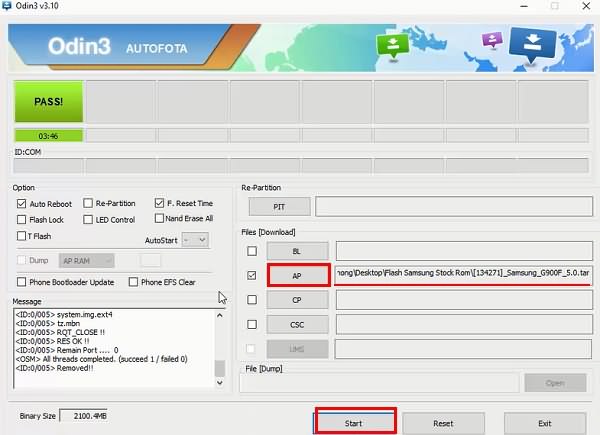
You can now launch Odin3 and connect your Samsung device to it. Odin3 will detect and recognize your device in no time. After that, please click on "AP" (Or "PDA" sometimes) and select the tar. file you just downloaded in advance. Then, click on "Start" to finish all the rest. When done, a "PASS" sign will prompt you that the process completes.Note that your Samsung should stay connected in the whole process.
There are four choices for your consideration. Please pick one and go ahead. If you're having trouble using these workarounds, please contact me. I'll be right there for you.
