"While I was trying to root my Samsung Galaxy Tab S 8.4 SM-T700 my nephew unplug my device. Now I'm stuck on the error: Firmware upgrade encountered an issue. Please select mode in Kies & try again. Kies does not pick up my device. Thank you in advance for your help." - Asked on XDA Forum
People Also Read:
● [Solved] What to Do When USB Debugging Greyed out?
● [Fix]Samsung S6 Stuck in Black Screen/Startup Loop/Odin Mode
Are you facing the similar case as above? As the screen prompts, you're suggested to try Kies. Samsung Kies, however, might not include your device model, so that's a bit useless. Normally, why your firmware upgrade would encounter such an issue? According to the reports from Samsung cell phone users, there are several causes.
- Try to get Samsung device rooted.
- Try to flash kernel with Samsung Galaxy/Note phone.
- Try to flash a new ROM on Samsung on one's own.
- Android upgrade process is interrupted via unexpected things like connection failure or dead battery.
- Other unknown situations.
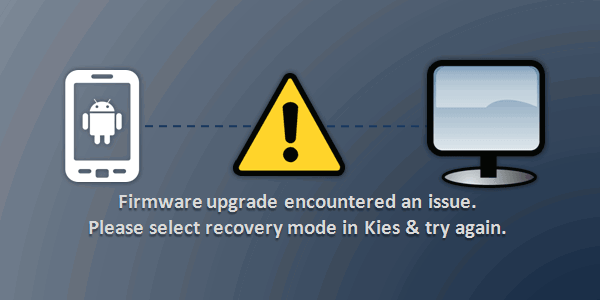
When it happens, you can try to hard reboot your Samsung phone as to fix the issue. However, it might come back from time to time, making a great nuisance. Therefore, I'd propose three methods to get you out of trouble. If interested, please read on.
Method 1: Factory Reset and Wipe Cache
If you've temporarily got rid of the warning screen, you can try to restore your Samsung to factory settings. However, this would erase all your data currently stored on the device, so having a full Samsung backup is necessary in advance. Then, please follow the instructions as below.
Case 1: Your Device is Still Accessible
Step 1. Open "Settings" app on Samsung.
Step 2. Tap "Back up and reset" option.
Step 3. Select "Factory data reset" to reset your Samsung.
Case 2: Your Device Stuck on Firmware Upgrade Issue Screen
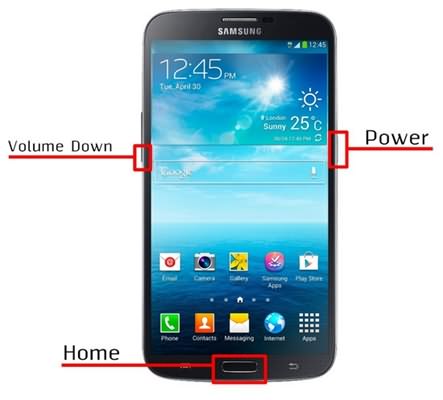
Step 1. Press and hold down "Power" and "Home" button until the screen dims.
Step 2. Hold down "Power", "Home" and "Volume Up" buttons together until you see Samsung logo screen.
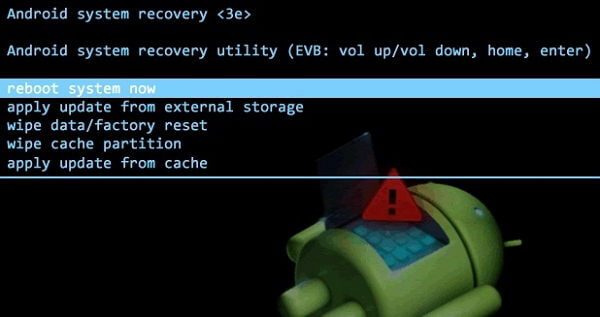
Step 3. Select from Recovery Mode menu "wipe cache partition" via "Volume Down" button and use "Power" button to confirm your step.
Step 4. When it completes, select "wipe data / factory reset" in the same way.
Step 5. Wait until the process is done and see whether the issue is resolved.
Method 2: Try Android Recovery to Fix Firmware Issue
If you're a noob, you might probably be blank right now. Some methods might seem obscure for you. If you're looking for a hassle-free way, Android Data Extraction meets your anticipation. With a feature to restore unresponsive devices, it's also suitable for firmware upgrade issue. For a clearer knowledge, please take a look at the following steps.
Supported Samsung Devices:
- Samsung Galaxy S4/S5/S6;
- Samsung Note 3/Note 4/Note 5;
- Samsung Galaxy Tab Pro 10.1;
Step 1. Install Android Data Extraction
Please give it a go with Android Data Extraction. You can click on the above button and download it onto your computer. After finishing the installation, please launch the program and select "Fix Device" under "Broken Android Phone Data Extraction".Note that in the case of data loss, you're strongly recommended to extract data from the Samsung through the first functionality.
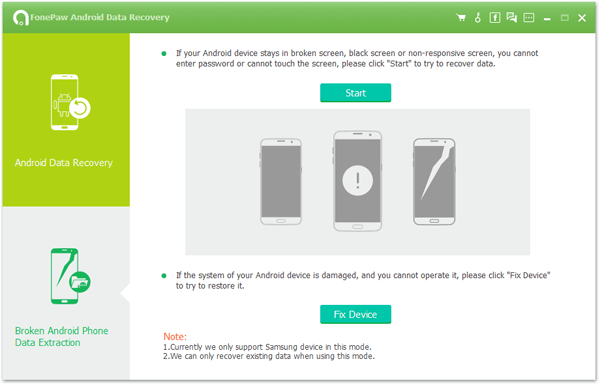
Step 2. Select Fault Screen
There are five options of different fault cases for your reference. In your case, please select "Others" and click "Next" to go on.
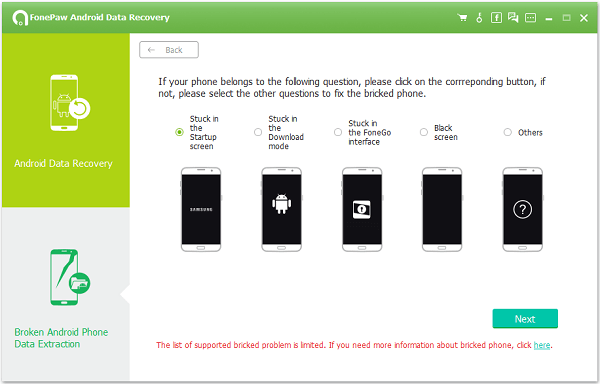
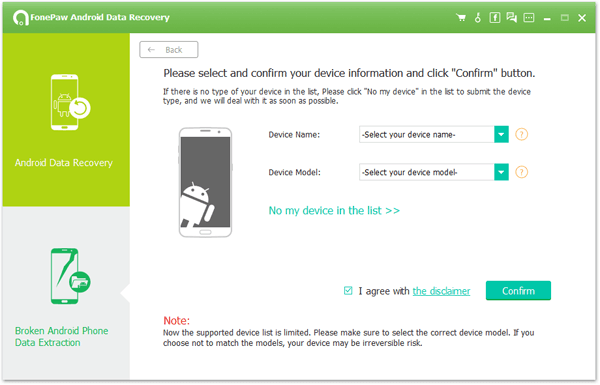
Step 3. Select Samsung Information
Now, please connect your Samsung with the program via USB cable. Then, you need to choose "Device name" and "Device model" from the list. If your device model is not yet supported, please submit your device info as to help us improve our service. Then, browse "the disclaimer" before you click on "Confirm".
Note that you can check out device info from the back of the battery.
Step 4. Enter Download Mode
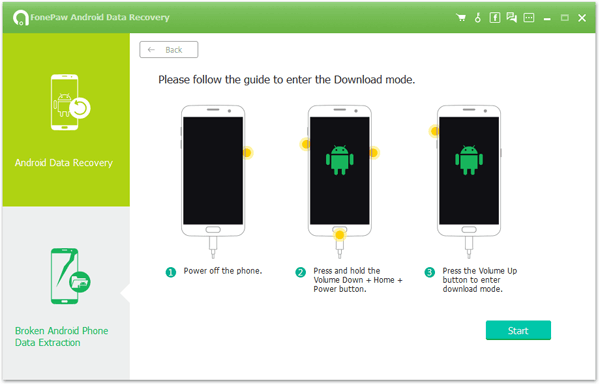
Please follow the on-screen steps and put your Samsung into Download Mode so that the software can download recovery package to repair your issue. When in, please select "Start" to go on.
1. Power off the phone.
2. Press and hold the "Volume Down", "Home" and "Power" buttons at the same time.
3. Press the "Volume Up" to enter Download mode.
Step 5. Start Fixing the Problem
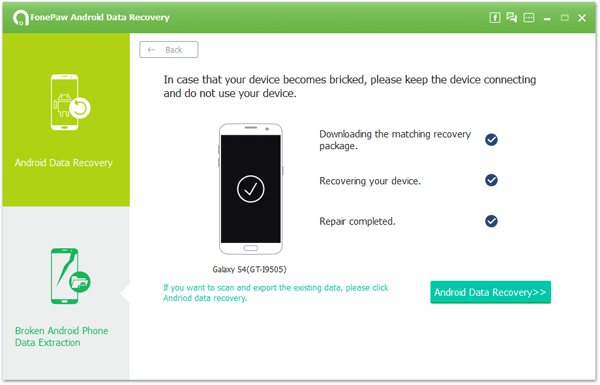
The software begins to download the matching recovery package now. When done, it goes to recover your device automatically. All you have to do is to wait until the process completes.
Method 3: Flash a New ROM Using Odin
Flashing a new ROM means to re-install the firmware on your Samsung, so this way might highly possibly fix your firmware upgrade problem. However, it's a bit complex in the process of ROM flashing. If you're new to mobile phone, you'd try the second method to be safe. If you want to try flashing ROM, please check out these things ahead of time.
1. You're going to use Odin3 for help, so please download it in the first place.
2. Please uninstall Samsung Kies if installed on computer, for it usually interferes when flashing with Odin.
3. If the USB driver of Samsung is not install probably. Please install it manually.
Steps to Flash a ROM on Samsung
Step 1. Download Related Firmware
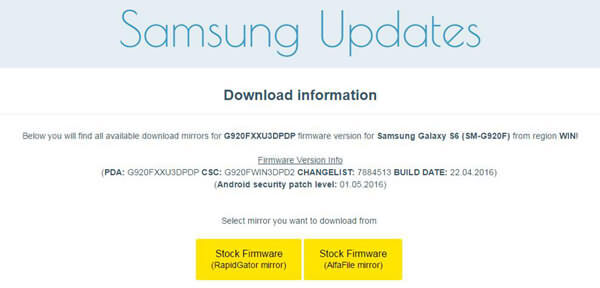
Download flashing package onto your computer at first from Samsung Updates. Please download the correct firmware. If you don't know your device model, just take a look at the back of the battery. Then, you'll get a file with the extension .tar.
Step 2. Enter Download Mode
Put your Samsung into "Download Mode". Power off the Samsung phone. Then, press and hold the "Volume Down", "Home" and "Power" buttons together for seconds. After that, press the "Volume Up" to enter Download mode.
Step 3. Use Odin3 to Flash ROM
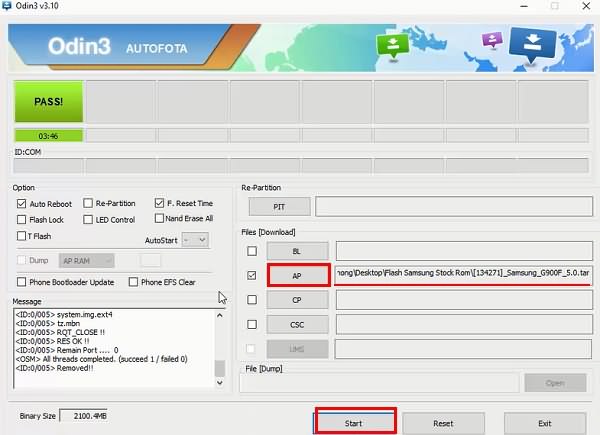
Please launch Odin3 on your PC and associate your Samsung with the program. Your device will be automatically detected and recognized. Now, please click on "AP" (sometimes it is called PDA as well).
Now, select the file you've downloaded. Then, click on "Start" and the process goes along the way. Please wait till the flashing completes. When done, a "PASS" with the green background would tell you.Note that you should keep the device connected in the whole process.
If your Samsung is supported by Android Data Recovery, please take it as your first consideration. As far as I am concerned, the first method would clear all your content, and the third is a bit risky. However, just pick the one you wish to try.
