Deleting useless data may be the first measure you will take when your phone memory is too full, slowing down your Samsung. However, after erasure, the phone memory is still insufficient. That is, the deleted data still remains in the device, occupying the internal storage all the time. So as to accelerate your Galaxy, you need some data eraser software to wholly free the memory.
But how can we Erase Samsung Galaxy Data without any complicate steps? You are able to follow the guide below to have a try. The two methods are different and you can choose one of them to give it a shot.
Part 1. Erase Samsung Galaxy Data with Android Data Recovery
Step 1. Download the Program and Connect Device to PC
Please download and install the Android Data Recovery on your PC and then launch it. On the interface, please click the “Data Erase” pane on the upper-right corner. After that, please connect your Android device to computer via the USB cable.
Step 2. Start Clearing Data on Samsung Phone
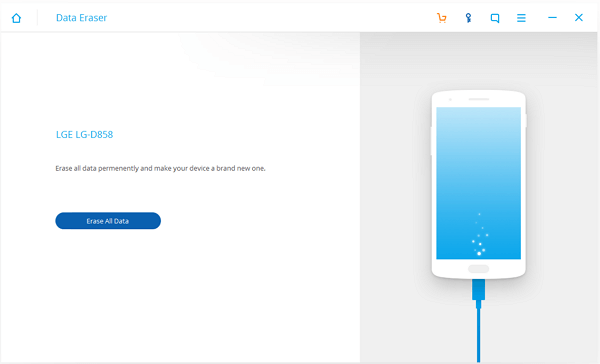
Once your Samsung is detected and recognized by the program, you are able to see the interface as below. Then please click the “Erase All Data” button to continue.
Step 3. Wait Patiently for the Erasing Process
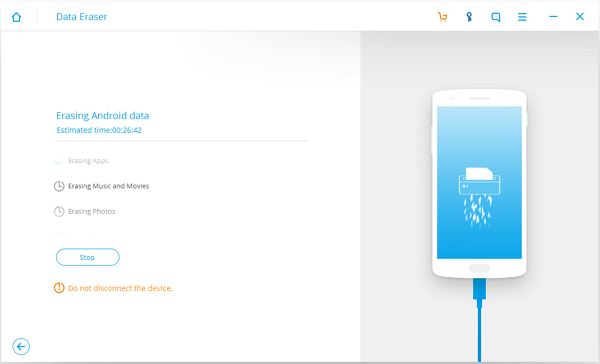
After you confirm to erase all the data on your Android device, please wait patiently as it may take you sometime. During the process, please do not disconnect your Samsung and may be have a cup of coffee would be a good choice.
Step 4. Reset Samsung Phone
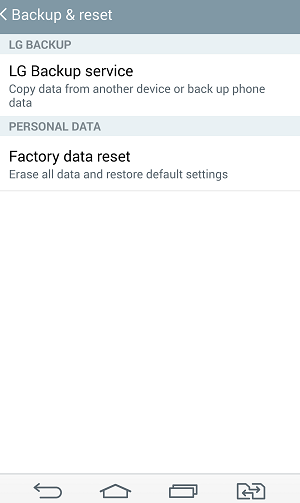
After the program erase all the data for you, it would be great to reset your phone, which can wipe out all the system data and settings. In this way, you can get the completely erased device.
Part 2. Erase Samsung Galaxy Data with Mobile Transfer
Mobile Transfer can help you thoroughly clear the existed or deleted data, and no one and no tool can retrieve it once more. In this way, you have no need to worry about the disclosure of significant data or memory insufficiency.
Step 1. Download the Software and Connect Phone to PC
Click the button below to download it. Then, connect your device to PC via USB cable.
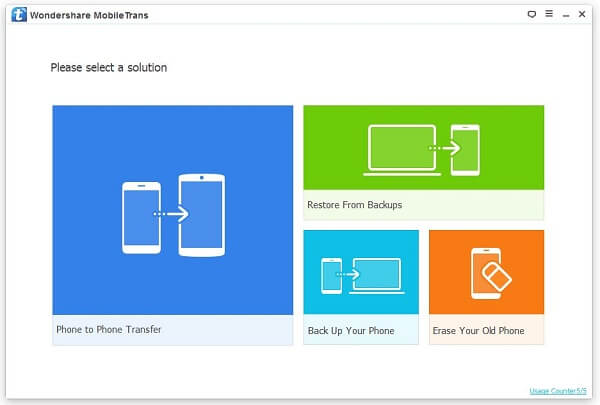
If your phone is successfully connected and recognized, you will see the following interface.
Step 2. Select the Mode and Confirm Erasure
Choose the "Erase Your Old Phone" box at the lower right and you will enter the interface below.
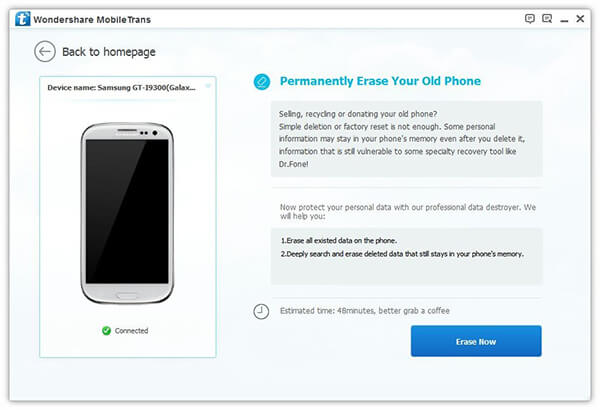
In the second box at right, it shows that both the existed or deleted data in the phone can be permanently wiped out. That is, once you confirm the deletion, you will never get the data back. So please make sure the data you chose you really want to clear.
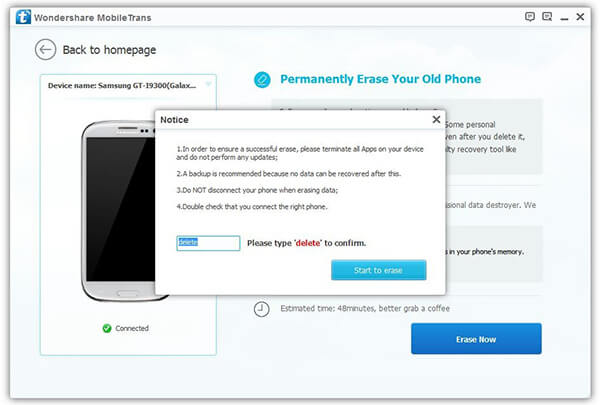
After you've ticked all the target data you want to erase, press the "Erase Now" button. A notice box will pop up, then type "delete" in the blank and click "Start to erase". The estimated erasure time may last 48 minutes or so.
Step 3. Complete Data Deletion Process
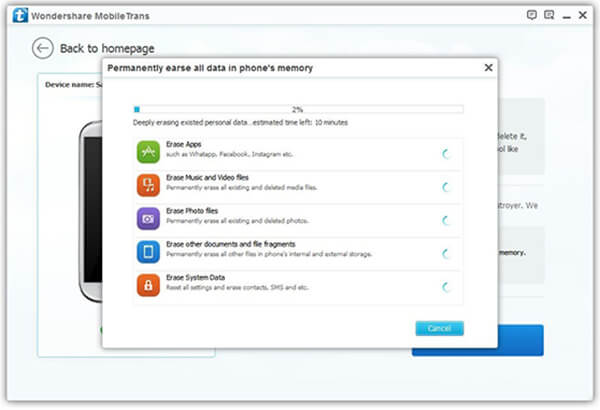
After you start to erase data, you will see the box above. The process bar shows you when the clean-up will end. When ended, a message about factory data reset confirmation will be on your device. To complete the process, you need to tap "Allow" to launch factory data rest.
Read up to here, I guess you may be among the people who are interested in the programs and desire to have it tackle the data eraser problem. If you still have any other questions about it, please add comments in the box, we will lose no time to resolve you doubts.
