When you glance over your Facebook on your Android, you may come cross some photos which you want to save. It can be really simple to keep it on your device. However, some of the users may wonder if it is possible to save it on computer to protect data loss as well as to save the storage space on Android. You may also ask why not just log in the Facebook on computer and it would be much easier to save the photos. Of cause you can, but isn’t it the fact that most of us would tend to log in the Facebook on device instead of on computer in our daily life, so that we are able to chat with friends anytime along with a phone.
In this way, saving images from Facebook on device to computer seems to be necessary for some of the users who fancies beautiful and interseting photos. This article would show you the guide to achieve the result.
Save Images from Facebook on Android to PC
Actually, it is not a complicated method to save it from Android to your computer, though it is not as directly as the way to mark down from Facebook that is logged in PC.
Step 1. Save Facebook Photos on Android
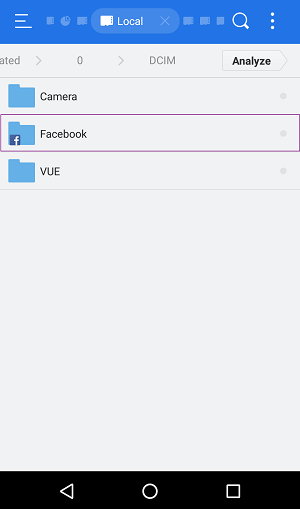
When you come across the beautiful photos from your Facebook on your device, just save it on the storage of your phone. Please tap the target pictures on the Facebook Timeline and then tap the menu botton of your device. You are now be able to see the option to save it to your phone as the interface shows below.

Note: You are able to check the loaction of the Facebook exported photos by navigating to “Storage/DCIM/Facebook/” on your phone storage.
Step 2. Transfer Photos from Android to Computer
Method 1. Copy Photos from Android to PC
You are able to export images by connecting device to computer with the USB cable just like the way you usually do. After your device is successfully detected by computer, you are able to check the imformation of your device on the removable disk. Please just go to the location where the Facebook photos are kept (refer to Storage/DCIM/Facebook/) and choose the ones you want to transfer. Then you can copy and paste them to the folder of your computer.
Method 2. Transfer Photos from device to Computer via Android Photo Recovery
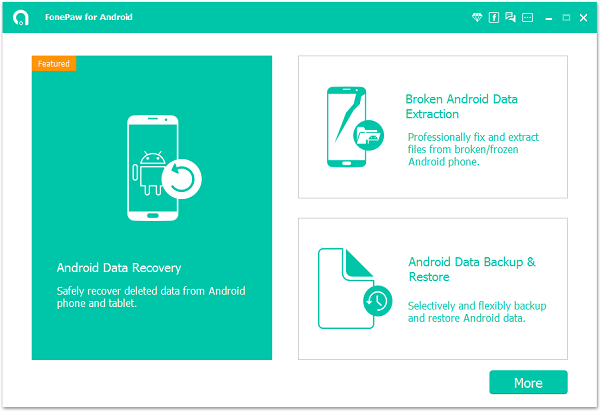
1. Download and install Android Photo Recovery
You can scan out all the photos including the Facebook photos on your device with the help of Android Photo Recovery program. First of all, please download and install it on your computer.
2. Connect Android to computer
After you download the program, please launch it. Then you need to plug your device into PC with the USB cable.
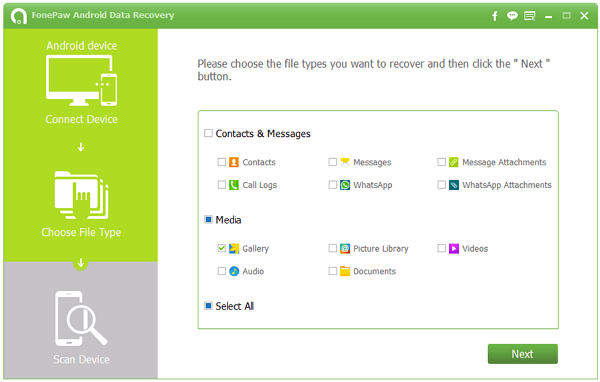
3. Select “Gallery” to scan
You can see all the data types on your device are displayed on the interface. Please choose “Gallery” and click “Next” to begin scanning.
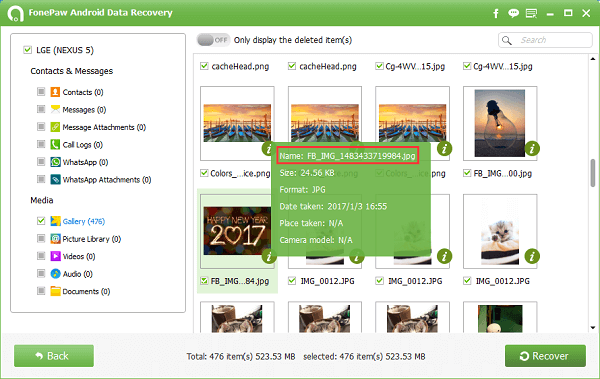
4. Export Facebook photos to computer
You are able to preview all the photos on your Android. If you only need to save the Facebook photos to computer, please check the image details like name, size, data, etc. And the Facebook photos are always kept in the naming pattern of FB_IMG_******, jpg. In this way, you can sort the pictures out easily. Then click “Restore” button to start transferring.
Note: With the help of Android Photo Recovery, you can not only save the Facebook photos on computer, but also recover the deleted photos with the same steps as above.
If you have any problem, please drop us a comment below!
